

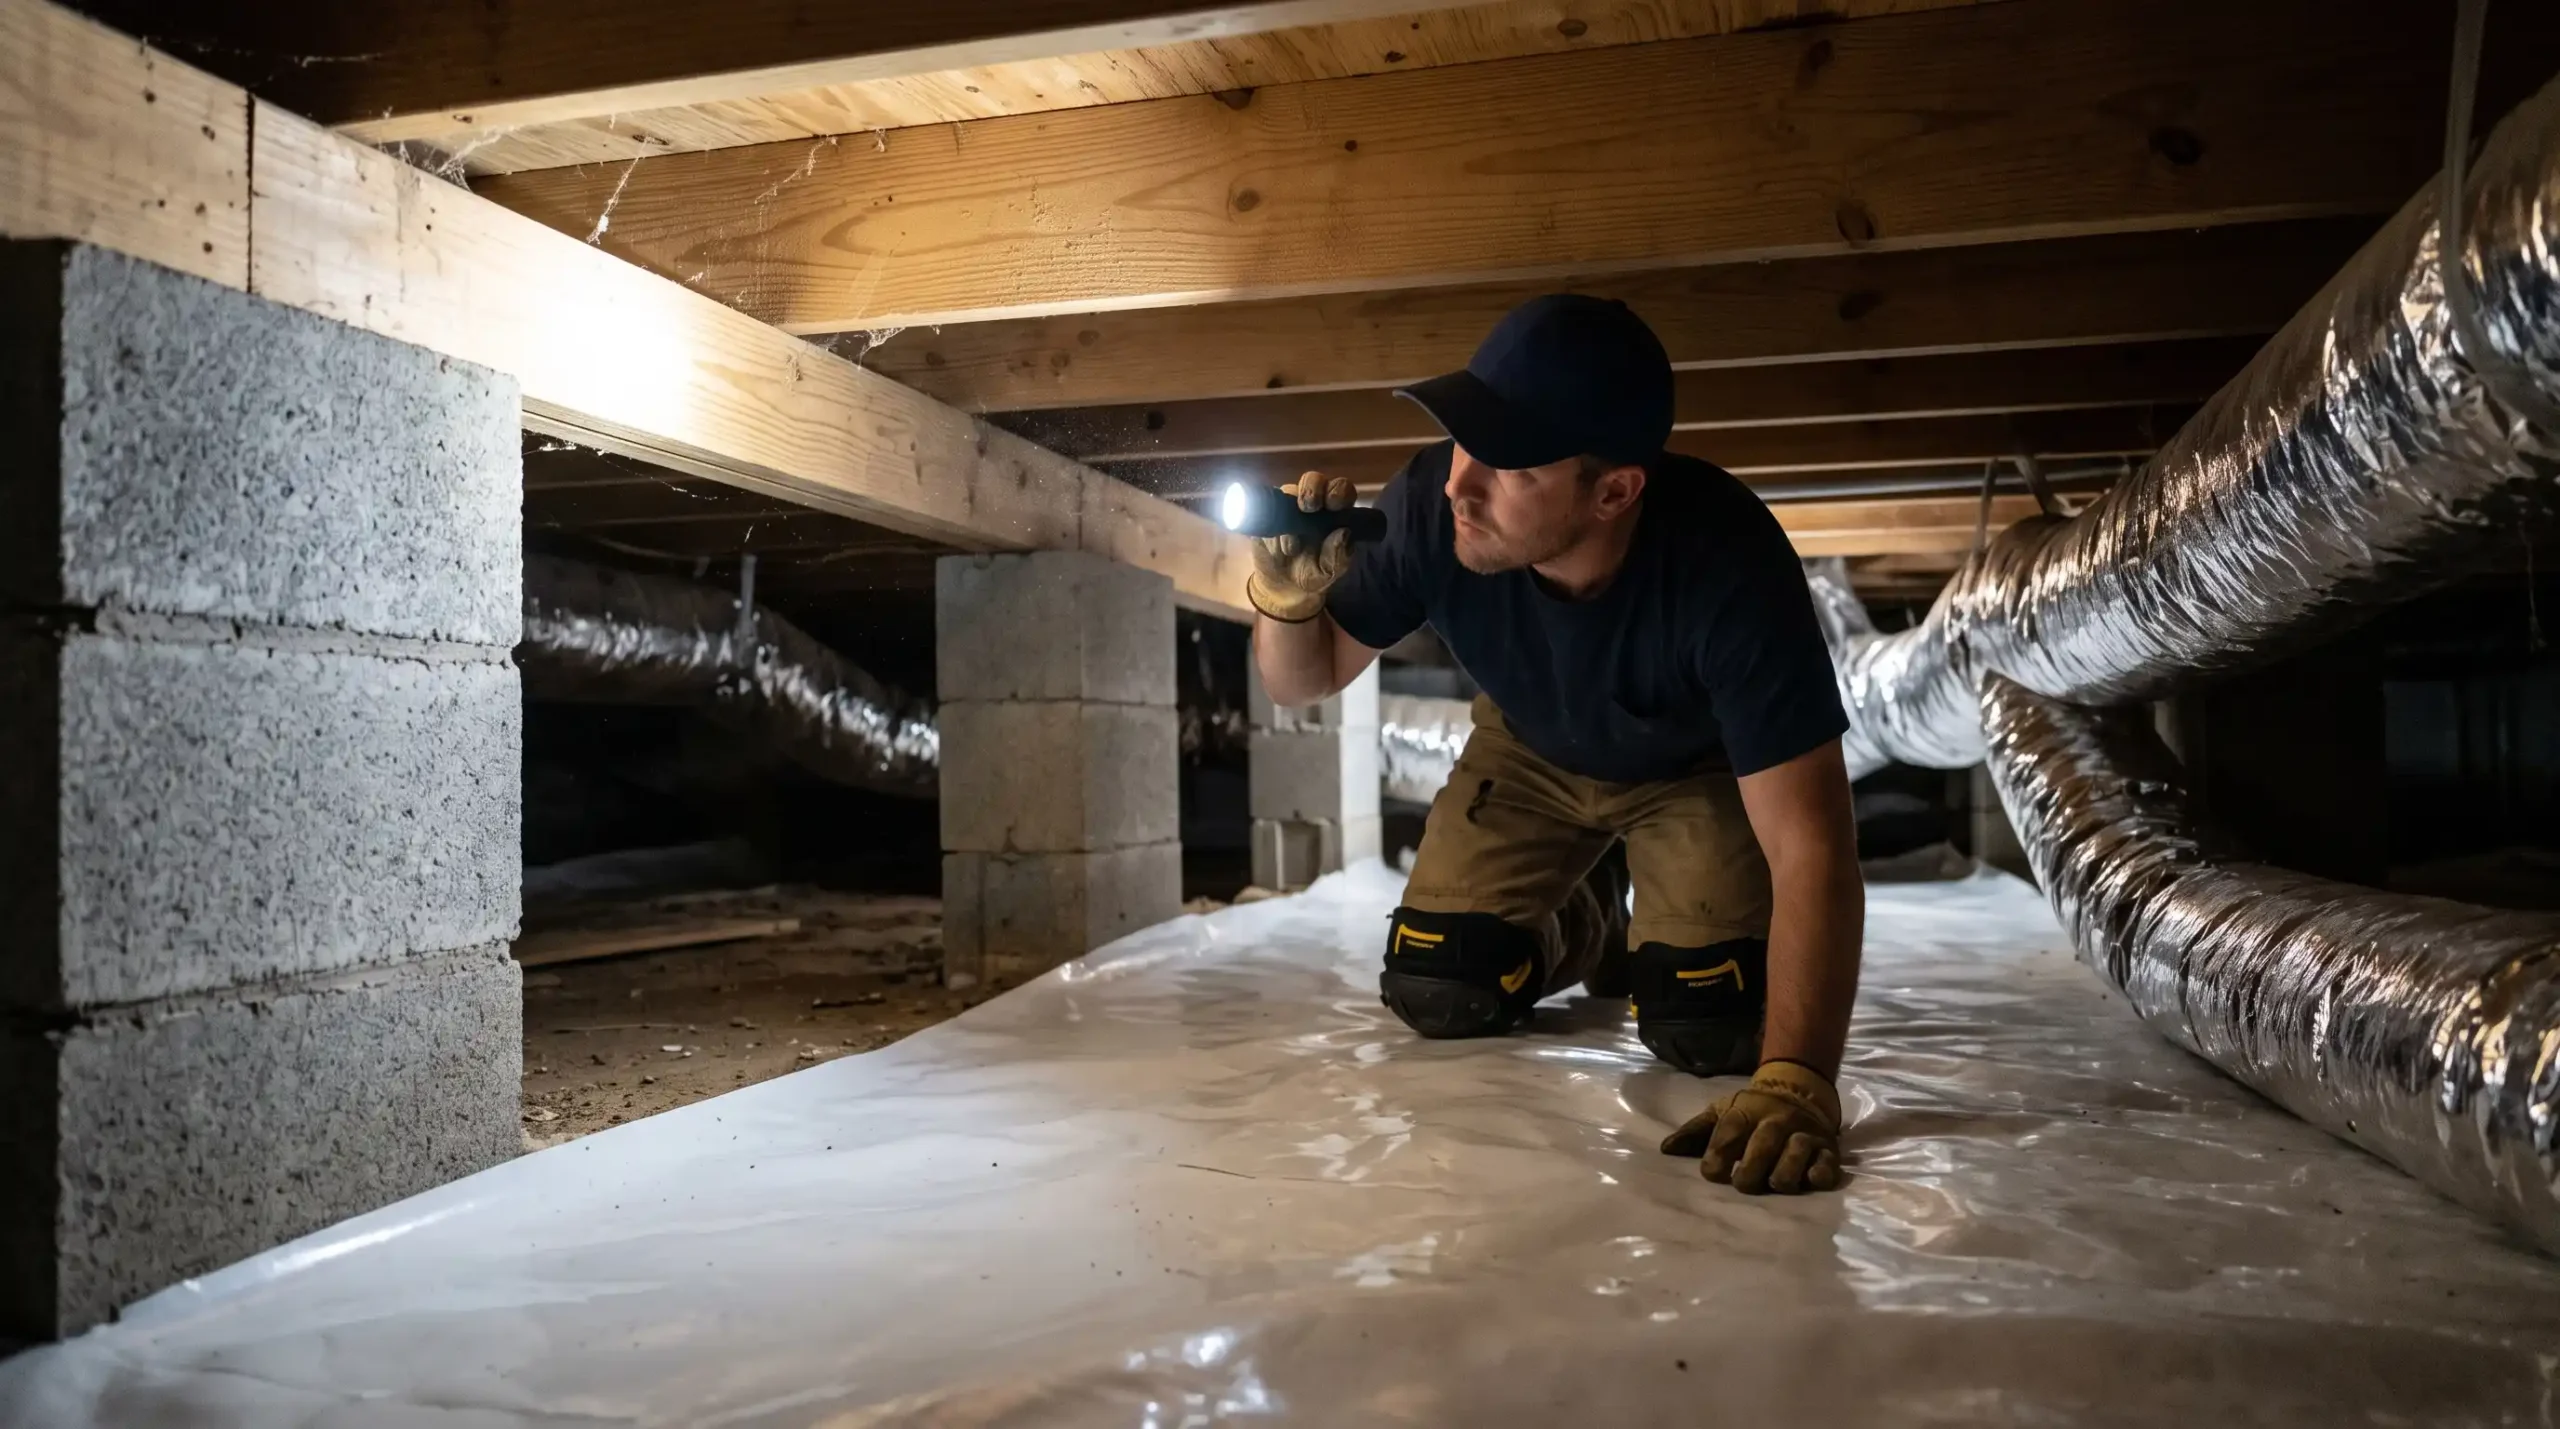
Homeowners rarely think about the ground beneath their feet until physical warning signs show up in daily life. Musty smells rising through floorboards, cupping hardwood planks, sticky doors that refuse to latch, and uncomfortably humid indoor air usually trace back to one neglected area: the crawl space. When faced with damp crawl space conditions, homeowners encounter a popular recommendation: crawl space encapsulation.
Sealing a crawl space requires a notable financial investment. Deciding whether that expense makes sense depends on the specific condition of your house, your regional climate, and the underlying issues you need to resolve. Understanding how the process works, what it costs, where contractors cut corners, and what realistic benefits to expect will help you make a sound choice for your property.
The Core Decision: When Encapsulating a Crawl Space Makes Financial Sense
Whether encapsulation represents a smart purchase comes down to building physics rather than sales pitches. Encapsulating a crawl space means transforming a damp, unconditioned dirt pit into a clean, dry, semi-conditioned mechanical envelope. For homes dealing with persistent moisture, implementing targeted crawl space moisture control delivers immediate structural protection.
Evaluating your home objectively prevents you from spending money on treatments you do not need, or conversely, ignoring hidden rot until repairs become catastrophic.
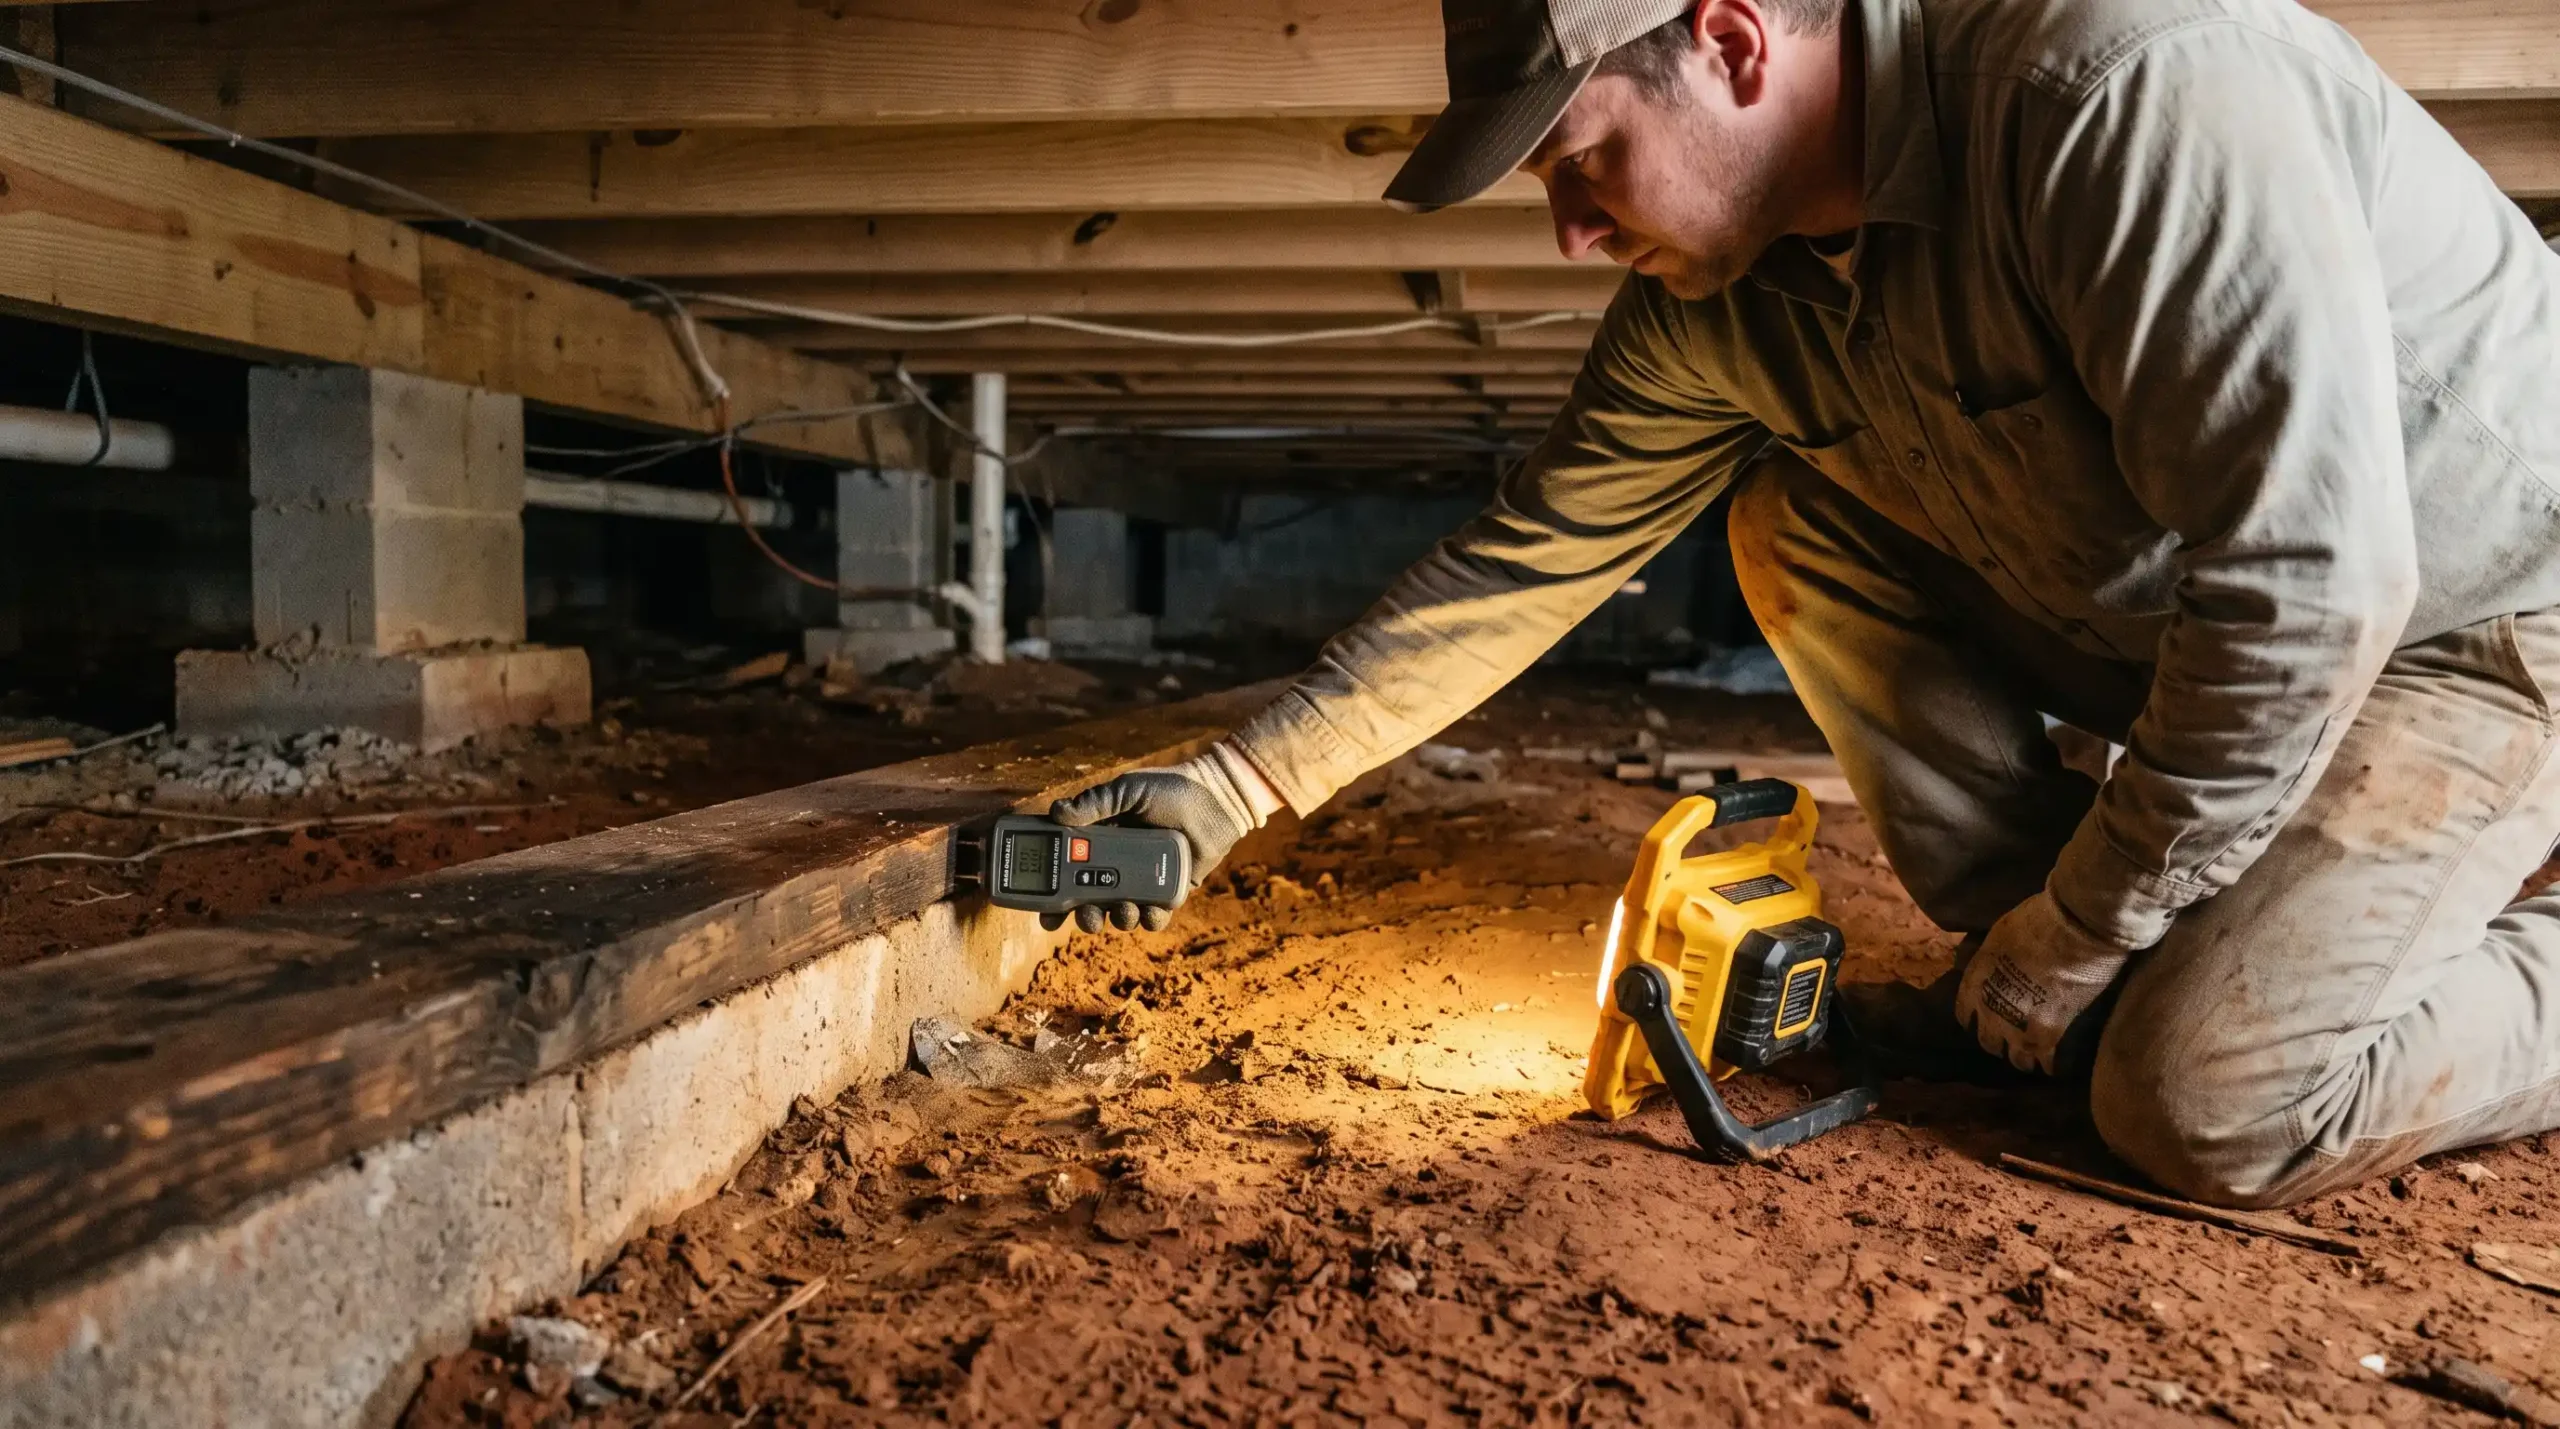
Situations Where the Investment Immediately Pays Off
Encapsulation pays for itself quickest when outdoor air and ground evaporation overwhelm the building envelope. You will find that encapsulation is worth the cost under the following circumstances:
-
The crawl space maintains a relative humidity consistently above 65 percent throughout the spring and summer.
-
Ductwork and heating equipment sit inside the crawl space, where cold metal ducts sweat constantly against humid air.
-
Surface mold or mildew reappears on floor joists even after cleanings or topical chemical treatments.
-
Hardwood flooring on the main floor cups, crowns, or separates due to subfloor moisture expansion.
-
Household occupants suffer from chronic respiratory allergies or asthma that flares up inside the house.
-
Wood framing exhibits moisture levels above 17 percent, creating prime conditions for decay fungi.
In these conditions, passive ventilation fails. Encapsulation resolves the underlying cause of moisture accumulation rather than simply treating recurring surface symptoms.
Circumstances Where You Should Delay or Skip Encapsulation
Encapsulation is not a universal cure for every foundation ailment. Approving an encapsulation contract without addressing pre-existing drainage or environmental hazards can worsen indoor conditions.
You should postpone or skip encapsulation in the following situations:
-
Active standing water or seasonal ground flooding occurs during rainstorms. Bulk water intrusion requires interior drainage and sump pumps before any liner is installed.
-
Your home sits on well-drained, sandy soil in an arid climate where the crawl space stays dry and wood moisture never exceeds 12 percent.
-
Open combustion appliances, like older standard-efficiency gas furnaces or atmospheric water heaters, reside in the crawl space without dedicated fresh air intake supplies.
-
You plan to sell the home in a matter of months and the crawl space shows no signs of fungal growth, structural sag, or standing water.
Investing thousands of dollars to seal a dry, problem-free crawl space yields minimal financial return. Fixing exterior roof drainage, extending downspouts, and monitoring indoor humidity might be all that your home requires.
How Building Science Redefined Foundation Airflow
For decades, home construction relied on passive wall vents to air out crawl spaces. The prevailing assumption was that cross-breezes through exterior vents would sweep out soil moisture and keep framing dry.
Building scientists during the late 1990s and early 2000s discovered that this logic failed in humid regions. When warm outdoor air enters a cool, shaded crawl space, the air temperature drops rapidly. Because cool air holds far less moisture than warm air, relative humidity spikes toward 100 percent, forming liquid water droplets on wooden joists, copper plumbing pipes, and fiberglass insulation.
Field studies conducted by the Advanced Energy corporation and the Department of Energy confirmed that unvented, sealed crawl spaces maintained significantly lower humidity levels and reduced wood rot compared to vented crawl spaces. This research changed how architects and builders view the ground beneath a residential home.
Why Vented Crawl Spaces Fail in Humid Climates
The Southeastern United States features long, hot summers filled with sustained humidity. Vented crawl spaces in North Carolina and South Carolina act as moisture collectors rather than drying chambers.
Outdoor air regularly carries a dew point in the mid-seventies during July and August. Foundation walls and subflooring sitting below ground level stay closer to 65 degrees. When humid air touches those cool surfaces, condensation develops continuously, soaking framing members for months at a time.
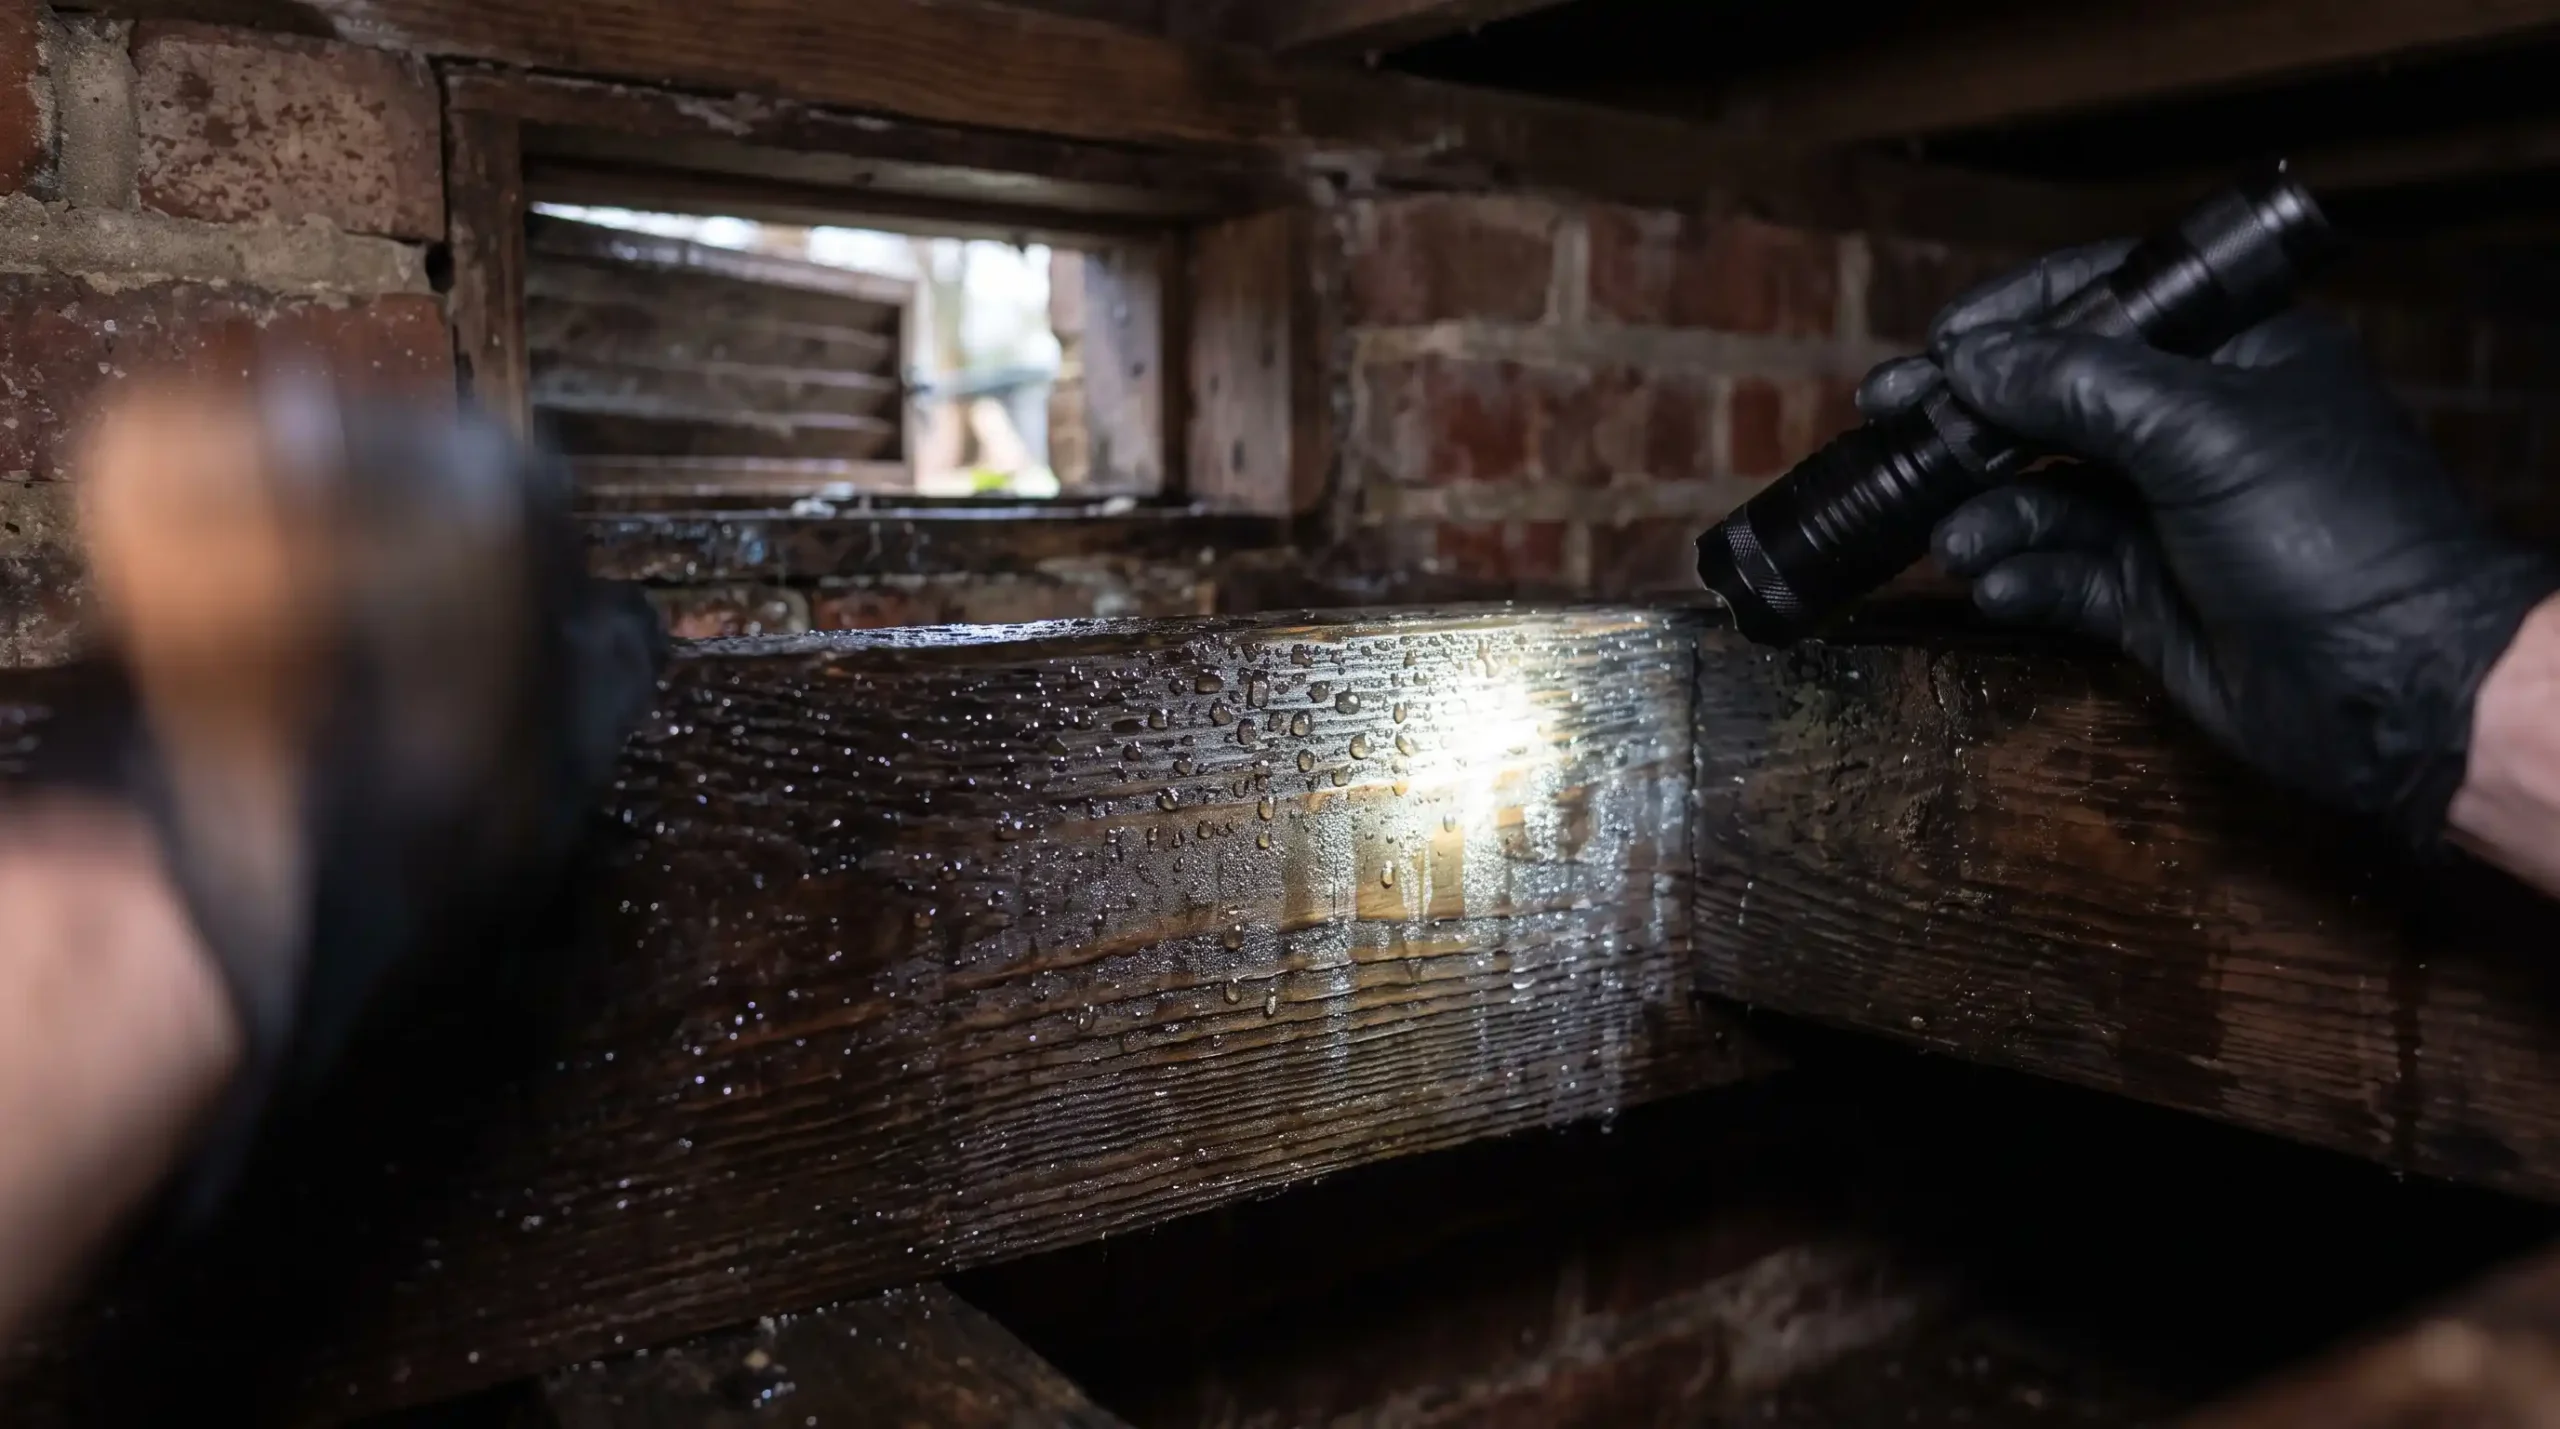
How Outdoor Air Destroys a Vented Crawl Space
The Thermal Moisture Cycle in an Open Foundation
-
Warm, Humid Air Enters: Outdoor summer air around 88°F with 75% relative humidity enters through foundation vents.
-
Contact with Earth-Cooled Surfaces: Foundation dirt and masonry walls remain naturally cooled by the surrounding ground, typically staying between 64°F and 68°F.
-
Rapid Drop in Air Temperature: As incoming humid air meets cool foundation surfaces, its temperature drops immediately.
-
Relative Humidity Surges Past 85%: Cooler air cannot hold the same volume of moisture, forcing relative humidity to spike past the dew point.
-
Condensation Settles on Framing: Liquid water droplets condense on wooden joists, subfloors, and cold ductwork, creating the exact moisture levels needed for fungal growth and wood decay.
The Physics of Condensation Beneath Your Living Room
Relative humidity measures how much water vapor air holds compared to the maximum amount it could hold at that specific temperature. Warm air expands and holds substantial water; cool air contracts and holds very little.
Imagine outdoor air at 85 degrees Fahrenheit with 70 percent relative humidity entering through a foundation vent. As that air enters the cool crawl space and drops to 68 degrees, its capacity to hold moisture drops sharply. The relative humidity quickly climbs past 100 percent, turning invisible water vapor into liquid water droplets.
This condensation drips onto the ground, soaks into fiberglass insulation batts, and absorbs directly into wooden joists. Over time, high moisture content softens framing timbers and damages the structural strength of your floor.
The Stack Effect and How Unconditioned Air Enters Living Spaces
A residential house behaves like a chimney due to a natural pressure differential called the stack effect. Heated air and warm indoor air naturally rise toward the upper levels of the home, escaping through attic vents, unsealed recessed lights, and ceiling gaps.
The Building Stack Effect
How Air Pressure Moves Moisture Through Your Home
| House Level | Air Movement | Impact on Indoor Air Quality |
| Attic and Roofline | Warm air escapes | Air naturally exhausts through soffit vents, ridge vents, and ceiling light penetrations. |
| Upper Living Areas | Continuous upward draw | Rising air creates low pressure below, pulling air from lower levels through wall cavities. |
| First Floor Rooms | Replacement air intake | Approximately 40% to 50% of the air breathed on the main level is pulled up directly from the crawl space. |
| Foundation Floor | Inward moisture pull | Unsealed dirt floors and open vents feed raw soil evaporation and outdoor humidity into the living space. |
As rising air exits through the top of the house, it creates negative pressure on the lower levels. The house draws replacement air from the lowest available opening, pulling air directly from the crawl space.
Environmental studies confirm that approximately 40 to 50 percent of the air you breathe on the first floor originates in the crawl space or basement. When below-grade areas harbor musty fungal spores, dust mites, or soil dampness, those airborne contaminants get sucked directly into your family room, kitchen, and bedrooms. This phenomenon also occurs when dealing with damp basement and garage foundation issues, demonstrating why isolating below-grade air from living spaces is essential.
Why Regional Building Codes Stopped Requiring Foundation Vents
Recognizing the failure of vented foundations, the International Residential Code (IRC) introduced section R408.3, officially permitting unvented crawl space construction.
State building codes across the Carolinas and neighboring regions adopted these provisions, giving builders and remodelers a clear framework for closing foundation vents. The code requires three elements:
-
A continuous vapor retarder that covers the dirt floor, turns up the foundation walls, and is sealed at all joints.
-
Permanently sealed exterior wall vents that block outside air infiltration.
-
Active mechanical drying through a dedicated dehumidifier, conditioned supply air from the HVAC system, or continuous exhaust ventilation.
These code revisions verified what building scientists had asserted for years: isolating the crawl space from the outdoor climate creates a far more stable building foundation.
The Anatomy of a Fully Encapsulated Crawl Space
Homeowners occasionally believe that laying a roll of thin black plastic across the dirt constitutes encapsulation. That simple step is merely a basic ground cover, not an engineered building envelope.
True encapsulation isolates the crawl space from exterior air, ground moisture, and thermal extremes. It requires durable materials installed according to strict building standards, working together within an integrated program of residential foundation services.
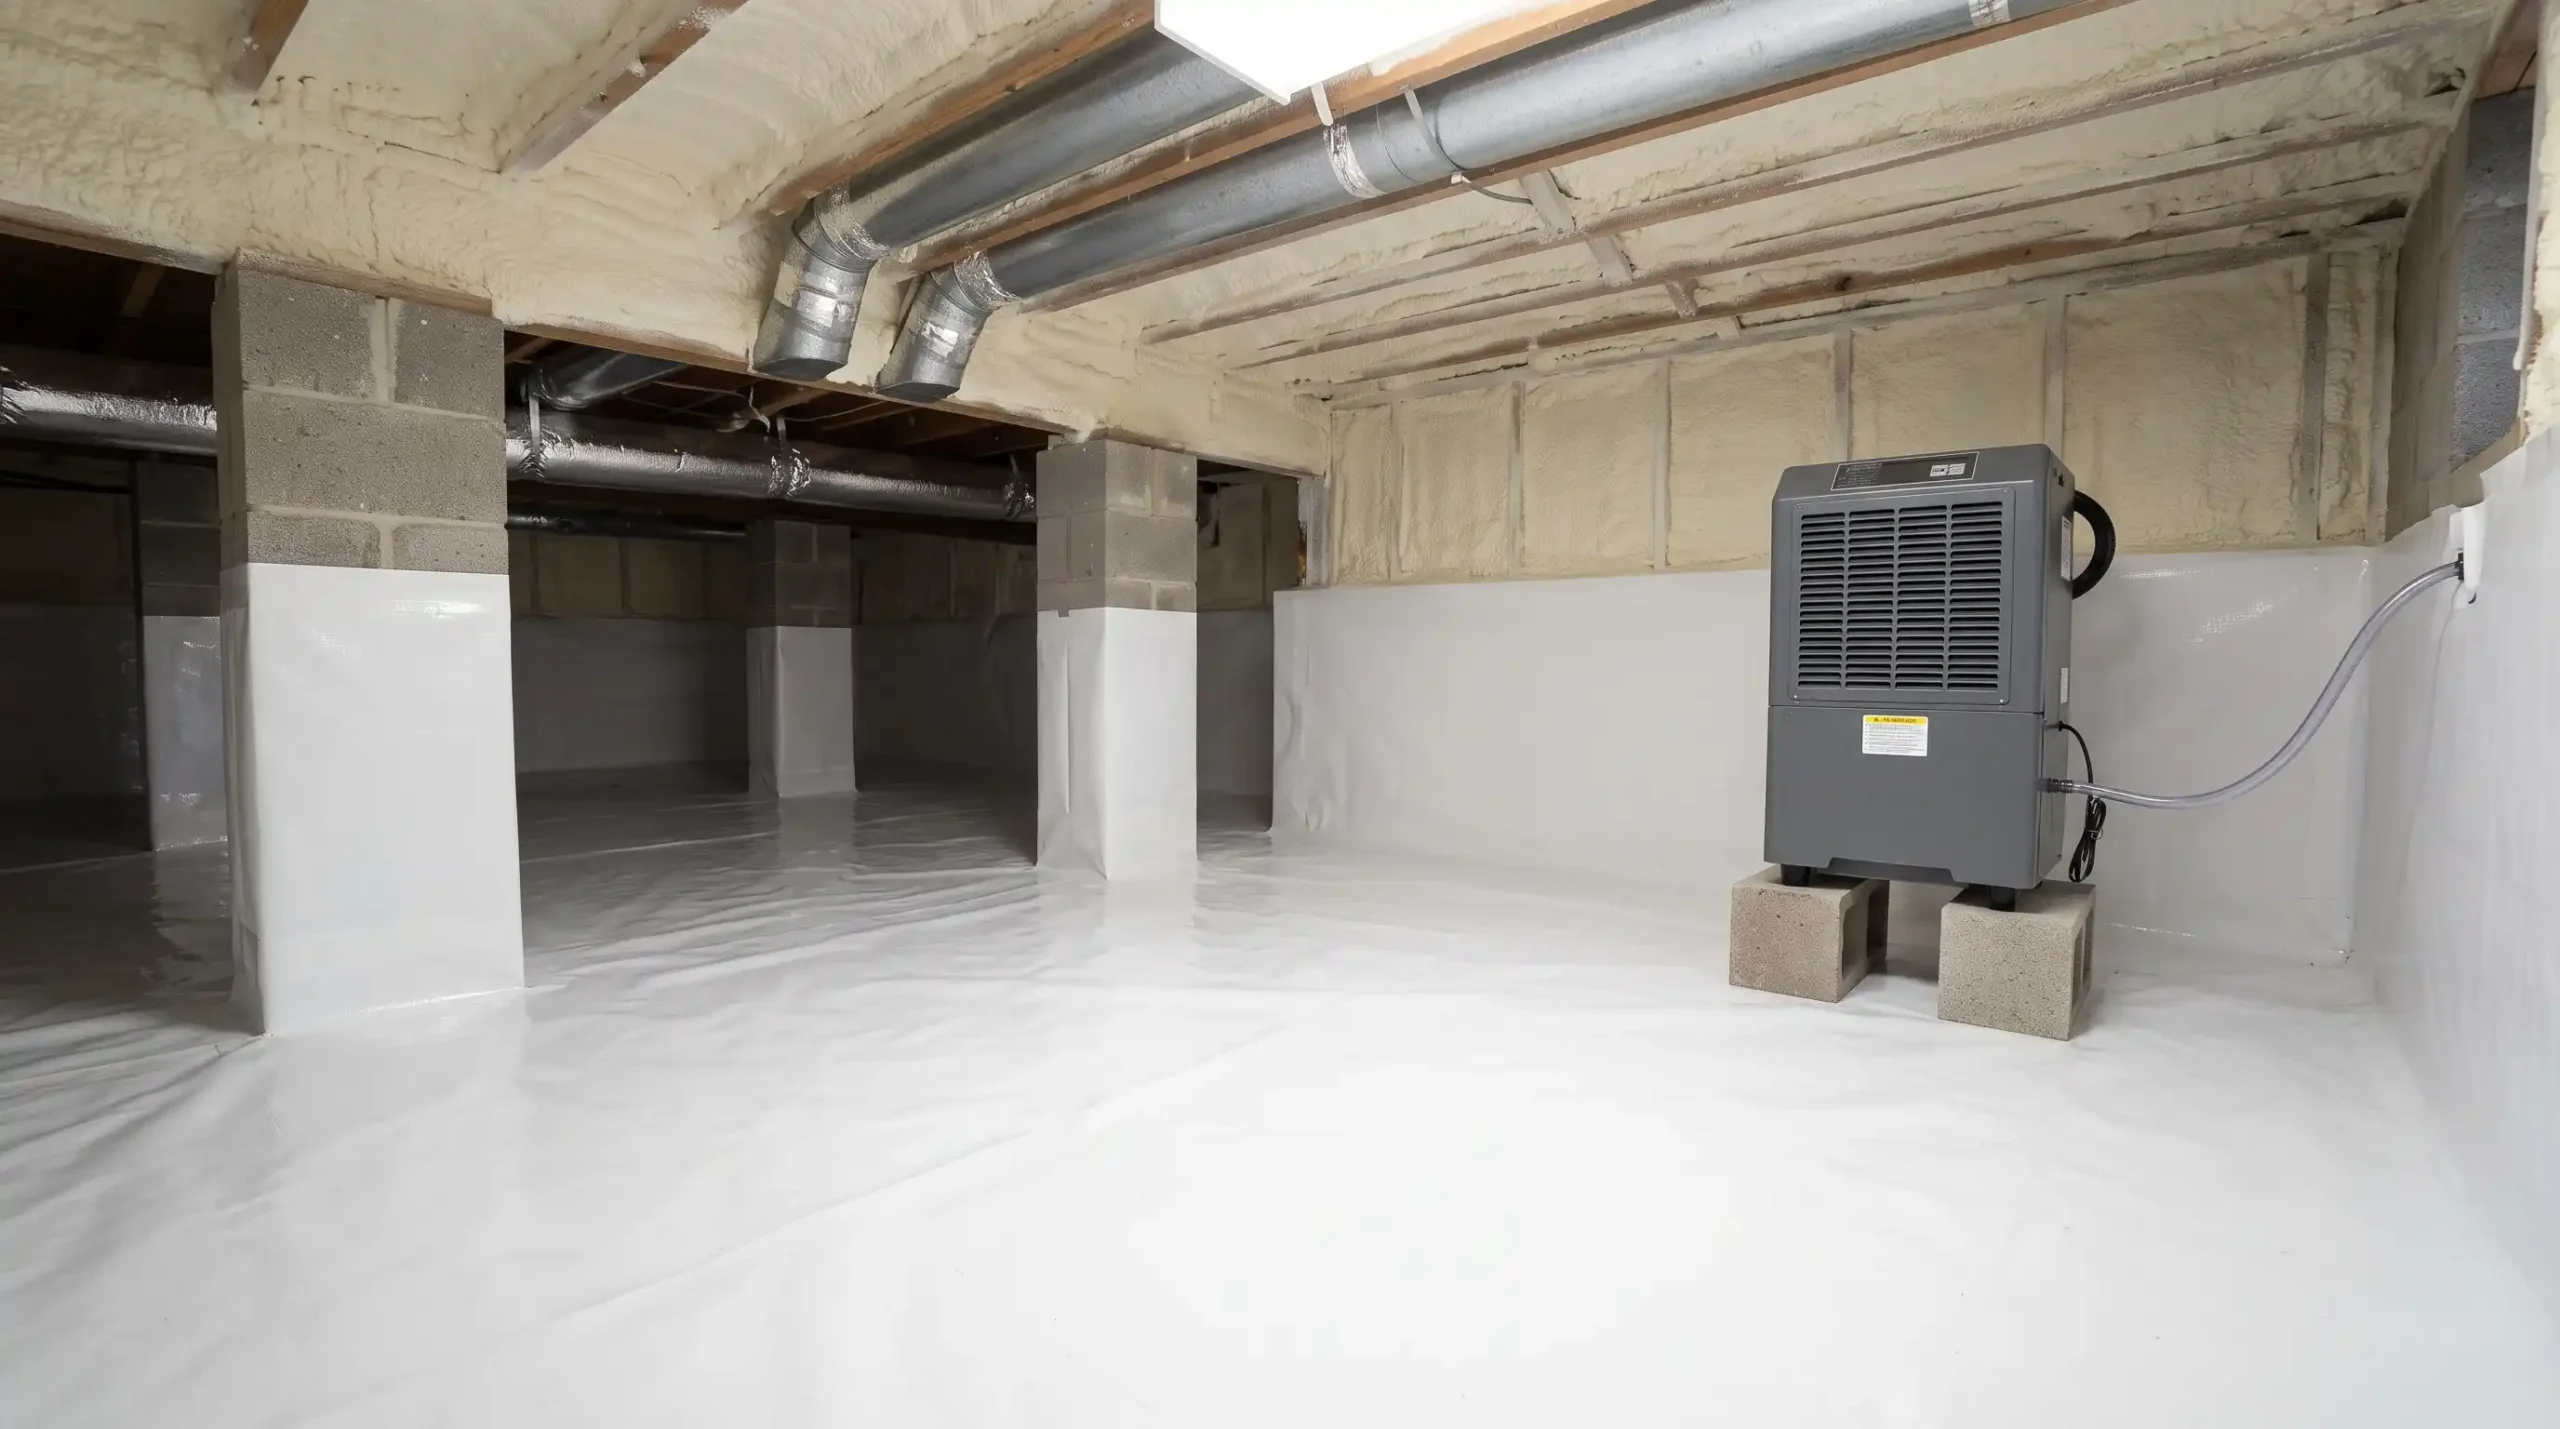
Ground and Wall Vapor Barriers Versus Basic Construction Plastic
The heart of an encapsulation system is the vapor barrier membrane. Inexpensive six-mil black polyethylene sheeting sold at home improvement stores tears easily, degrades within a few years, and lacks puncture resistance.
Professional encapsulation utilizes multi-ply, cross-laminated poly membranes ranging from 12-mil to 20-mil in thickness. These durable liners feature high puncture resistance, internal cord reinforcement, and antimicrobial additives that inhibit biological growth on the liner surface.
Installers roll the membrane across the crawl space floor, overlapping seams by at least twelve inches and sealing every joint with heavy-duty waterproof acrylic seam tape. The liner extends up perimeter masonry walls to within three inches of the wooden sill plate and wraps around every interior pier, fastened mechanically to the masonry with drive pins and sealed with polyurethane caulk.
Permanent Vent Sealing and Rim Joist Air Infiltration Defense
Exterior foundation vents must be closed off to halt outdoor humidity. Installers seal each vent opening using rigid expanded polystyrene foam board, structural vent covers, or masonry blocks, sealing all perimeter edges with expanding closed-cell foam.
Technicians also seal the perimeter band joist and rim joist cavities located along the top of the foundation wall. Uninsulated rim joists allow outside air to seep through tiny gaps between the foundation wall and the wooden sill plate. Sealing these bays with rigid foam board or spray foam insulates the thermal boundary and eliminates cold winter drafts.
Dedicated Commercial Dehumidifiers and Mechanical Drainage
Even with an airtight vapor barrier, small amounts of moisture will penetrate the space through concrete porosity, plumbing connections, and foundation access doorways. Without a way to remove this moisture, a sealed crawl space can turn into a closed terrarium.
A self-draining commercial crawl space dehumidifier acts as the heart of the system. Unlike residential room dehumidifiers that struggle in cool environments, commercial units are engineered to operate efficiently at temperatures down to 40 degrees Fahrenheit.
These units feature automated digital humidistats calibrated to run only when relative humidity exceeds 50 to 55 percent. The extracted moisture drains continuously through dedicated PVC lines to the home exterior or directly into an internal sump pump basin, removing the need to empty collection buckets manually.
The Hidden Risks and Downsides Contractors Rarely Mention
Every home improvement involves trade-offs. While encapsulation solves significant moisture troubles, it also introduces mechanical and environmental considerations that sales representatives sometimes gloss over.
Understanding these factors allows you to evaluate proposals critically and ensure your installation adheres to safety codes.
Combustion Appliance Backdrafting and Indoor Carbon Monoxide Risks
One of the most serious safety considerations involves combustion appliances located within the crawl space. If you have an atmospheric gas furnace or standard gas water heater that pulls combustion air from the open crawl space, sealing all exterior vents deprives those burners of fresh oxygen.
Deprived of makeup air, fuel-burning equipment can backdraft, spilling carbon monoxide, nitrogen dioxide, and dangerous combustion gases directly into the crawl space. From there, the stack effect pulls those lethal gases up into your living areas.
Before encapsulating, a licensed professional must inspect your appliances. Atmospheric gas appliances must either receive dedicated outside combustion air ducts or be upgraded to direct-vent, sealed-combustion units.
Soil Gas Dynamics and Post-Installation Radon Accumulation
Radon is a colorless, odorless, naturally occurring radioactive gas produced by the decay of uranium in soil and rock. The Environmental Protection Agency identifies radon as the second leading cause of lung cancer in the United States, recommending mitigation at levels of 4.0 picocuries per liter (pCi/L) or higher.
When you install an airtight plastic membrane across a dirt crawl space, you change the soil gas pressure dynamics. Trapping soil gases beneath a liner can sometimes push radon toward unsealed wall penetrations and into the living quarters above.
Responsible contractors recommend testing for radon prior to encapsulation. If radon levels are elevated, technicians install a perforated radon collection pipe underneath the vapor barrier, connecting it to an exterior vent pipe and fan for sub-membrane depressurization.
Code-Required Termite Inspection Gaps Along Foundation Walls
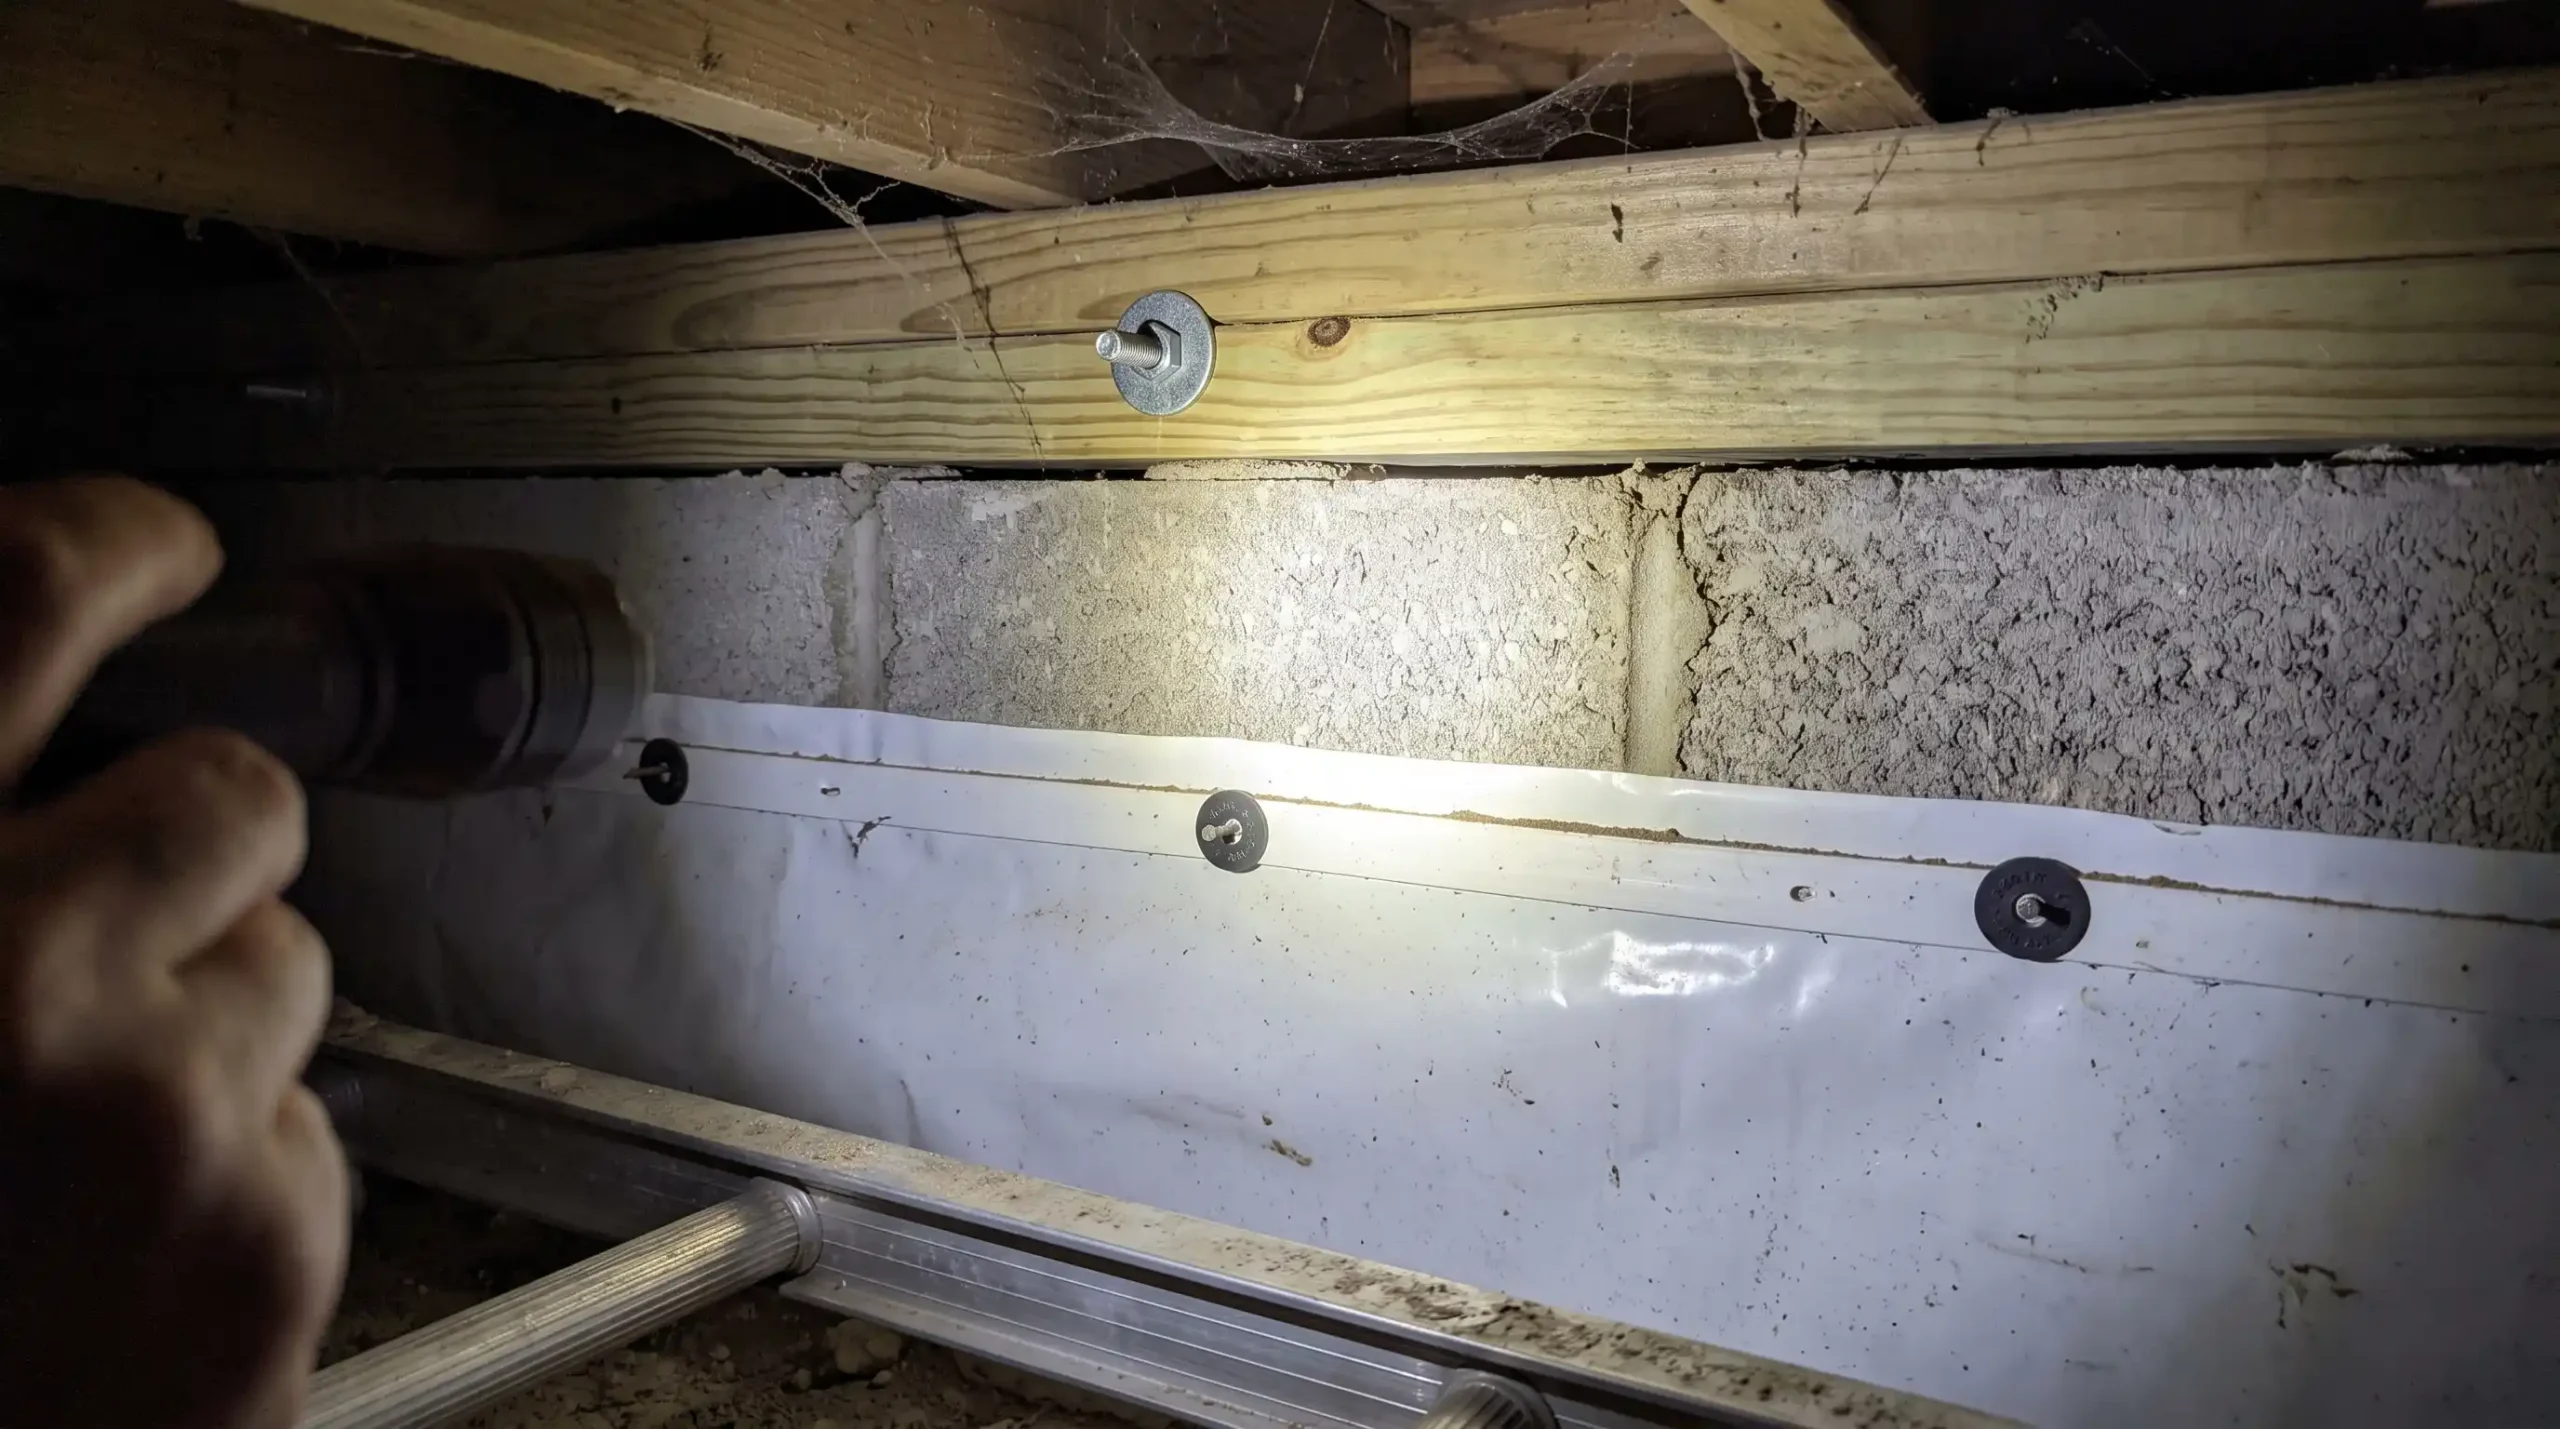
Termite extermination companies and residential building codes mandate an unobstructed inspection gap along the top of all foundation walls. Installers must leave an exposed band of bare masonry, roughly three inches wide, between the top edge of the plastic barrier and the bottom of the wooden sill plate.
Wall Encapsulation Detail with Code-Compliant Termite Gap
Approved Wall Sealing Assembly from Subfloor to Ground
-
Floor Joists and Subfloor: Standard framing lumber supporting your first-floor living space.
-
Treated Wooden Sill Plate: The horizontal framing board bolted directly to the top of the foundation masonry.
-
3-Inch Bare Masonry Termite Inspection Gap: A code-mandated strip of bare concrete block left completely clear of plastic and spray foam so pest technicians can detect termite mud tubes.
-
Mechanically Fastened Liner Edge: Reinforced poly vapor barrier secured to the masonry wall using nylon drive pins and polyurethane sealant.
-
Perimeter Wall Membrane (12-mil to 20-mil): Heavy-duty protective liner running down the wall and overlapping the ground sheet.
-
Sealed Dirt Floor: Ground vapor barrier sealed with waterproof acrylic tape across all seams and piers.
Covering the entire foundation wall with white plastic or thick spray foam all the way up to the wood framing violates code and can void your existing termite bond. Termites build subterranean mud tubes to travel from the ground into framing timbers.
If that masonry surface is hidden behind plastic or foam, termites can tunnel upward undetected, consuming structural wood for years before anyone notices the damage. Always insist that your installation maintains this inspection gap.
Long-Term Dehumidifier Operation and Equipment Lifespans
A sealed crawl space relies on mechanical dehumidification to maintain safe humidity levels. Commercial dehumidifiers are hard-working mechanical appliances with limited operational lifespans.
Most high-grade crawl space dehumidifiers operate reliably for eight to twelve years before requiring major servicing or replacement. Homeowners must account for the ongoing cost of air filter replacements, minor electrical power usage, and the eventual capital expense of replacing the unit a decade down the road.
If a dehumidifier fails quietly and remains broken for months without the homeowner noticing, humidity levels inside the sealed space will climb rapidly, sparking fungal outbreaks on damp framing.
Real Costs of Crawl Space Encapsulation: Pricing Breakdown by Component
The cost of encapsulating a crawl space varies considerably depending on the home footprint, working conditions, and the extent of pre-existing moisture issues. A modest, clean crawl space costs substantially less than a large, mud-filled foundation with structural rot.
Reviewing a detailed cost breakdown helps you recognize fair pricing and avoid surprise fees during construction.
| Encapsulation Component | Typical Material Spec | Average Cost Range | Purpose and Function |
| Heavy Vapor Barrier | 12-mil to 20-mil reinforced poly | $2,000 to $4,500 | Covers ground, wraps piers, lines perimeter walls |
| Vent & Perimeter Sealing | Rigid foam board, expanding foam | $400 to $900 | Blocks outside air and stops rim joist drafts |
| Commercial Dehumidifier | 70 to 105 pint/day self-draining | $1,600 to $2,800 | Regulates humidity below 55 percent relative humidity |
| Site Prep & Cleaning | Debris haul-off, raking, leveling | $500 to $1,500 | Creates a clean, safe sub-base for liner longevity |
| Wall & Seam Fastening | Acrylic tape, anchors, mastic | $350 to $700 | Secures airtight seams across overlapping joints |
| Labor & Mobilization | Specialized crawl space crews | $1,800 to $4,000 | Safe handling, installation, and confined space labor |
Average Price Ranges and Per-Square-Foot Calculations
For most residential properties in the United States, complete professional encapsulation ranges from $5,500 to $15,000, with national project averages hovering between $7,000 and $11,000.
Calculated on a square-foot basis, expect total project costs to fall between $3.50 and $10.00 per square foot of crawl space area. Smaller crawl spaces (around 600 square feet) lean toward the higher per-square-foot cost because equipment mobilization, dehumidifier hardware, and electrical setup represent fixed expenses regardless of foundation size.
Large crawl spaces exceeding 2,000 square feet often achieve lower per-square-foot rates, although the total project cost will naturally be higher due to the sheer volume of liner and labor required.
Essential Pre-Installation Repairs That Increase Total Invoices
Estimates often expand when technicians discover unaddressed structural or moisture problems beneath the house. These ancillary repairs are not part of the encapsulation itself, but skipping them causes the encapsulation to fail:
-
Active Mold Remediation: Removing active fungal growth from subfloors and joists using antimicrobial washes and HEPA vacuuming adds between $1,500 and $4,500.
-
Standing Water Management: Installing an interior perimeter French drain connected to a sump pump basin runs from $2,500 to $6,000.
-
Damaged Insulation Removal: Bagging and disposing of wet, rodent-contaminated fiberglass batts costs $1.00 to $2.00 per square foot.
-
Concrete and Slab Leveling: Resolving uneven exterior patios or settling slabs around foundation entries through concrete slab repair prevents water from running back into foundation vents.
When these supplementary tasks are required, total project invoices can climb into the $12,000 to $18,000 range. While that figure feels intimidating, performing these repairs simultaneously protects your entire home structure.
How Accessibility, Height, and Debris Impact Labor Rates
Crawl spaces are physically demanding work environments. Working in a crawl space with four feet of clean clearance allows installers to move swiftly, carry materials easily, and complete projects on schedule.
In contrast, an eighteen-inch clearance forces technicians to crawl flat on their stomachs while maneuvering heavy rolls of 20-mil plastic, power tools, and dehumidifiers. This restriction extends job timelines from two days to four or five days, directly increasing labor expenses.
Severe construction debris, sharp granite stones, broken bottles, or animal contamination also require extensive rake-out and haul-away time before workers can safely lay down plastic without puncturing the liner.
Return on Investment: Realistic Energy Savings Versus Avoided Repairs
Contractors often pitch encapsulation on promises of dramatic energy savings, with some marketing materials claiming heating and cooling bills will drop by thirty or forty percent. These exaggerated claims set unrealistic expectations.
A realistic economic analysis reveals that the true return on investment stems from avoided structural damage and protected real estate value, not simply utility bill reductions.
Financial Return Profile Over a 10-Year Ownership Horizon
| Protected Home Component | Estimated Repair Cost Without Sealing | How Encapsulation Protects Your Budget |
| Floor Framing and Subfloors | $4,000 to $12,000 | Prevents structural rot, eliminating the need to lift walls or sister weakened joists. |
| Mold Remediation Visits | $2,000 to $5,000 | Stops the recurring moisture source rather than paying for repeated chemical cleanups. |
| HVAC Systems and Ductwork | $1,200 to $2,500 | Prevents rusted metal ductwork, wet insulation, and premature blower motor failure. |
| Heating and Cooling Expenses | $2,500 to $4,500 | Reduces the workload on cooling equipment and stops winter drafts through subflooring. |
| Estimated Total Value | $9,700 to $24,000 | Protects equity and prevents emergency structural expenses. |
Dissecting Utility Bill Reductions Without Unrealistic Marketing Hype
Field monitoring by the Department of Energy and Building America shows that sealing and insulating an unconditioned crawl space delivers an average reduction of 15 percent in heating and cooling energy consumption.
Notice that this percentage applies strictly to your heating and cooling expenses, not your entire electric bill. Refrigerators, lighting, water heaters, and electronics consume energy unaffected by crawl space conditions.
If a household spends $1,800 annually specifically on heating and air conditioning, a 15 percent savings equals approximately $270 per year. Against an $8,000 encapsulation investment, relying solely on utility savings yields a payback horizon of roughly twenty to twenty-five years. While lower bills are welcome, energy efficiency alone rarely justifies the upfront expense.
The Real Financial Savings: Wood Rot, Mold Removal, and Floor Joist Repairs
The genuine financial return of encapsulation is risk mitigation. When relative humidity in a crawl space consistently hovers above 70 percent, wood rot fungi slowly digest cellulose fibers within floor joists, main girders, and rim boards.
Repairing rotted foundation framing is expensive and disruptive. Lifting settled interior walls, installing temporary support shores, and sistering compromised floor joists through dedicated structural repair easily costs between $4,000 and $15,000.
Wood Moisture Content Thresholds and Structural Risk
| Moisture Range | Wood Condition | Structural Assessment |
| 0% to 12% | Completely Dry | Ideal stability. Wood framing is safe from fungal growth and pest attraction. |
| 13% to 16% | Normal Range | Typical seasonal range in conditioned structures. Structurally sound. |
| 17% to 19% | Warning Zone | Inactive mold spores can germinate and spread across floor joist surfaces. |
| 20% to 27% | Active Decay Range | Critical threshold. Wood-destroying fungi actively break down cellulose and lignin fibers. |
| 28% and Higher | Fiber Saturation | Severe decay hazard. Structural wood softens quickly, leading to sagging subfloors and failure. |
Treating recurring mold outbreaks in unsealed crawl spaces costs between $1,500 and $3,500 per visit, and the mold returns as soon as humid summer weather arrives. Encapsulation permanently stops this cycle, preserving structural wood and sparing homeowners repetitive remediation bills.
Appraisal Value and Real Estate Resale Advantages
In competitive real estate markets, a clean, encapsulated crawl space provides a clear advantage during home sales. Prospective buyers and home inspectors routinely examine crawl spaces for dampness, microbial growth, and rotted subfloors.
Discovering active mold or sagging joists during a pre-sale inspection often triggers renegotiations, requests for large repair escrows, or buyer contract cancellations. In contrast, an encapsulated crawl space presenting a bright white liner, fresh air, and an active dehumidifier gives buyers immediate confidence, protecting your asking price.
Encapsulation Compared to Simple Vapor Barriers and Insulation
When evaluating foundation solutions, homeowners frequently compare encapsulation to less expensive alternatives like thin plastic covers or underfloor fiberglass batts. Understanding the functional differences between these methods helps clarify why pricing varies so significantly.
| System Attribute | Loose 6-Mil Plastic Sheeting | Fiberglass Batts Between Joists | Complete Encapsulation Assembly |
| Installed Cost | $0.50 to $1.50 per sq ft | $1.50 to $3.00 per sq ft | $3.50 to $10.00 per sq ft |
| Floor Coverage | Loose on dirt floor only | None (affixed to subfloor ceiling) | 100% sealed, taped, and pinned |
| Wall & Pier Sealing | None (stops at edge of dirt) | None | Covered and mechanically fastened |
| Air Sealing Quality | None (vents remain wide open) | None (air flows around batts) | Airtight vents and sealed rim joists |
| Relative Humidity Control | None (dependent on weather) | None | Active commercial dehumidifier |
| Durability Under Foot | Easily tears within 1 to 2 years | Sagging occurs as batts absorb moisture | 15 to 25+ years heavy-duty life |
| Pest Deterrence | Minimal (rodents nest underneath) | High risk (rodents nest inside batts) | High deterrence (sealed entry points) |
Traditional Six-Mil Loose Polyethylene Ground Covers
A loose six-mil plastic ground cover is the bare minimum foundation treatment. It rests across the dirt without taped seams, wall extensions, or vent closures.
While it slows direct evaporation from the soil beneath it, it leaves masonry walls and open foundation vents exposed. Outdoor summer humidity pours through the vents unimpeded, while plumbers and technicians easily kick the loose plastic aside, leaving bare soil exposed.
A basic ground cover costs very little, but it cannot solve persistent humidity problems in warm, damp climates.
Fiberglass Subfloor Batt Insulation and Why It Frequently Fails
For decades, builders installed pink or yellow fiberglass insulation batts between the floor joists of vented crawl spaces. This practice remains one of the most problematic details in modern home construction.
Fiberglass does not stop air movement or water vapor. During humid summers, cool subflooring causes moisture to condense directly inside the fiberglass fibers. The batts absorb moisture like a sponge, become heavy, and sag away from the floorboards.
Over time, wet fiberglass pulls moisture against wooden joists, accelerating rot while creating an inviting nesting material for mice and rats. Removing ruined, soiled fiberglass is often the first step in restoring crawl space health through comprehensive crawl space repair.
Engineered Sealed Membrane Assemblies with Active Humidity Control
Complete encapsulation takes a whole-system approach. Instead of trying to insulate the floor directly beneath your feet, it moves the thermal and moisture boundary out to the perimeter foundation walls and ground.
By sealing the dirt floor, wrapping the support piers, closing the vents, and insulating the band boards, the entire crawl space becomes part of your conditioned home envelope. Adding a commercial dehumidifier provides active mechanical control, keeping relative humidity below 55 percent regardless of outdoor rainfall or heat waves.
Critical Pre-Installation Checks: Water Drainage and Structural Stability
A common error in foundation remediation is applying an encapsulation system over untreated drainage problems. Encapsulation manages water vapor, but it cannot stop standing bulk water or hydrostatic ground pressure.
Before rolling out vapor barriers, a thorough evaluation of site drainage and structural integrity must take place.
Sequential Order of Foundation Remediation
Phase 1: Exterior Roof Drainage Management
Clean out gutter troughs and attach downspout extensions that discharge roof runoff at least six to ten feet away from foundation walls.
Phase 2: Yard Grading and Surface Water Redirection
Re-grade landscaping beds so soil slopes downward away from the foundation perimeter, preventing rainwater from pooling against brickwork.
Phase 3: Interior Water Mitigation
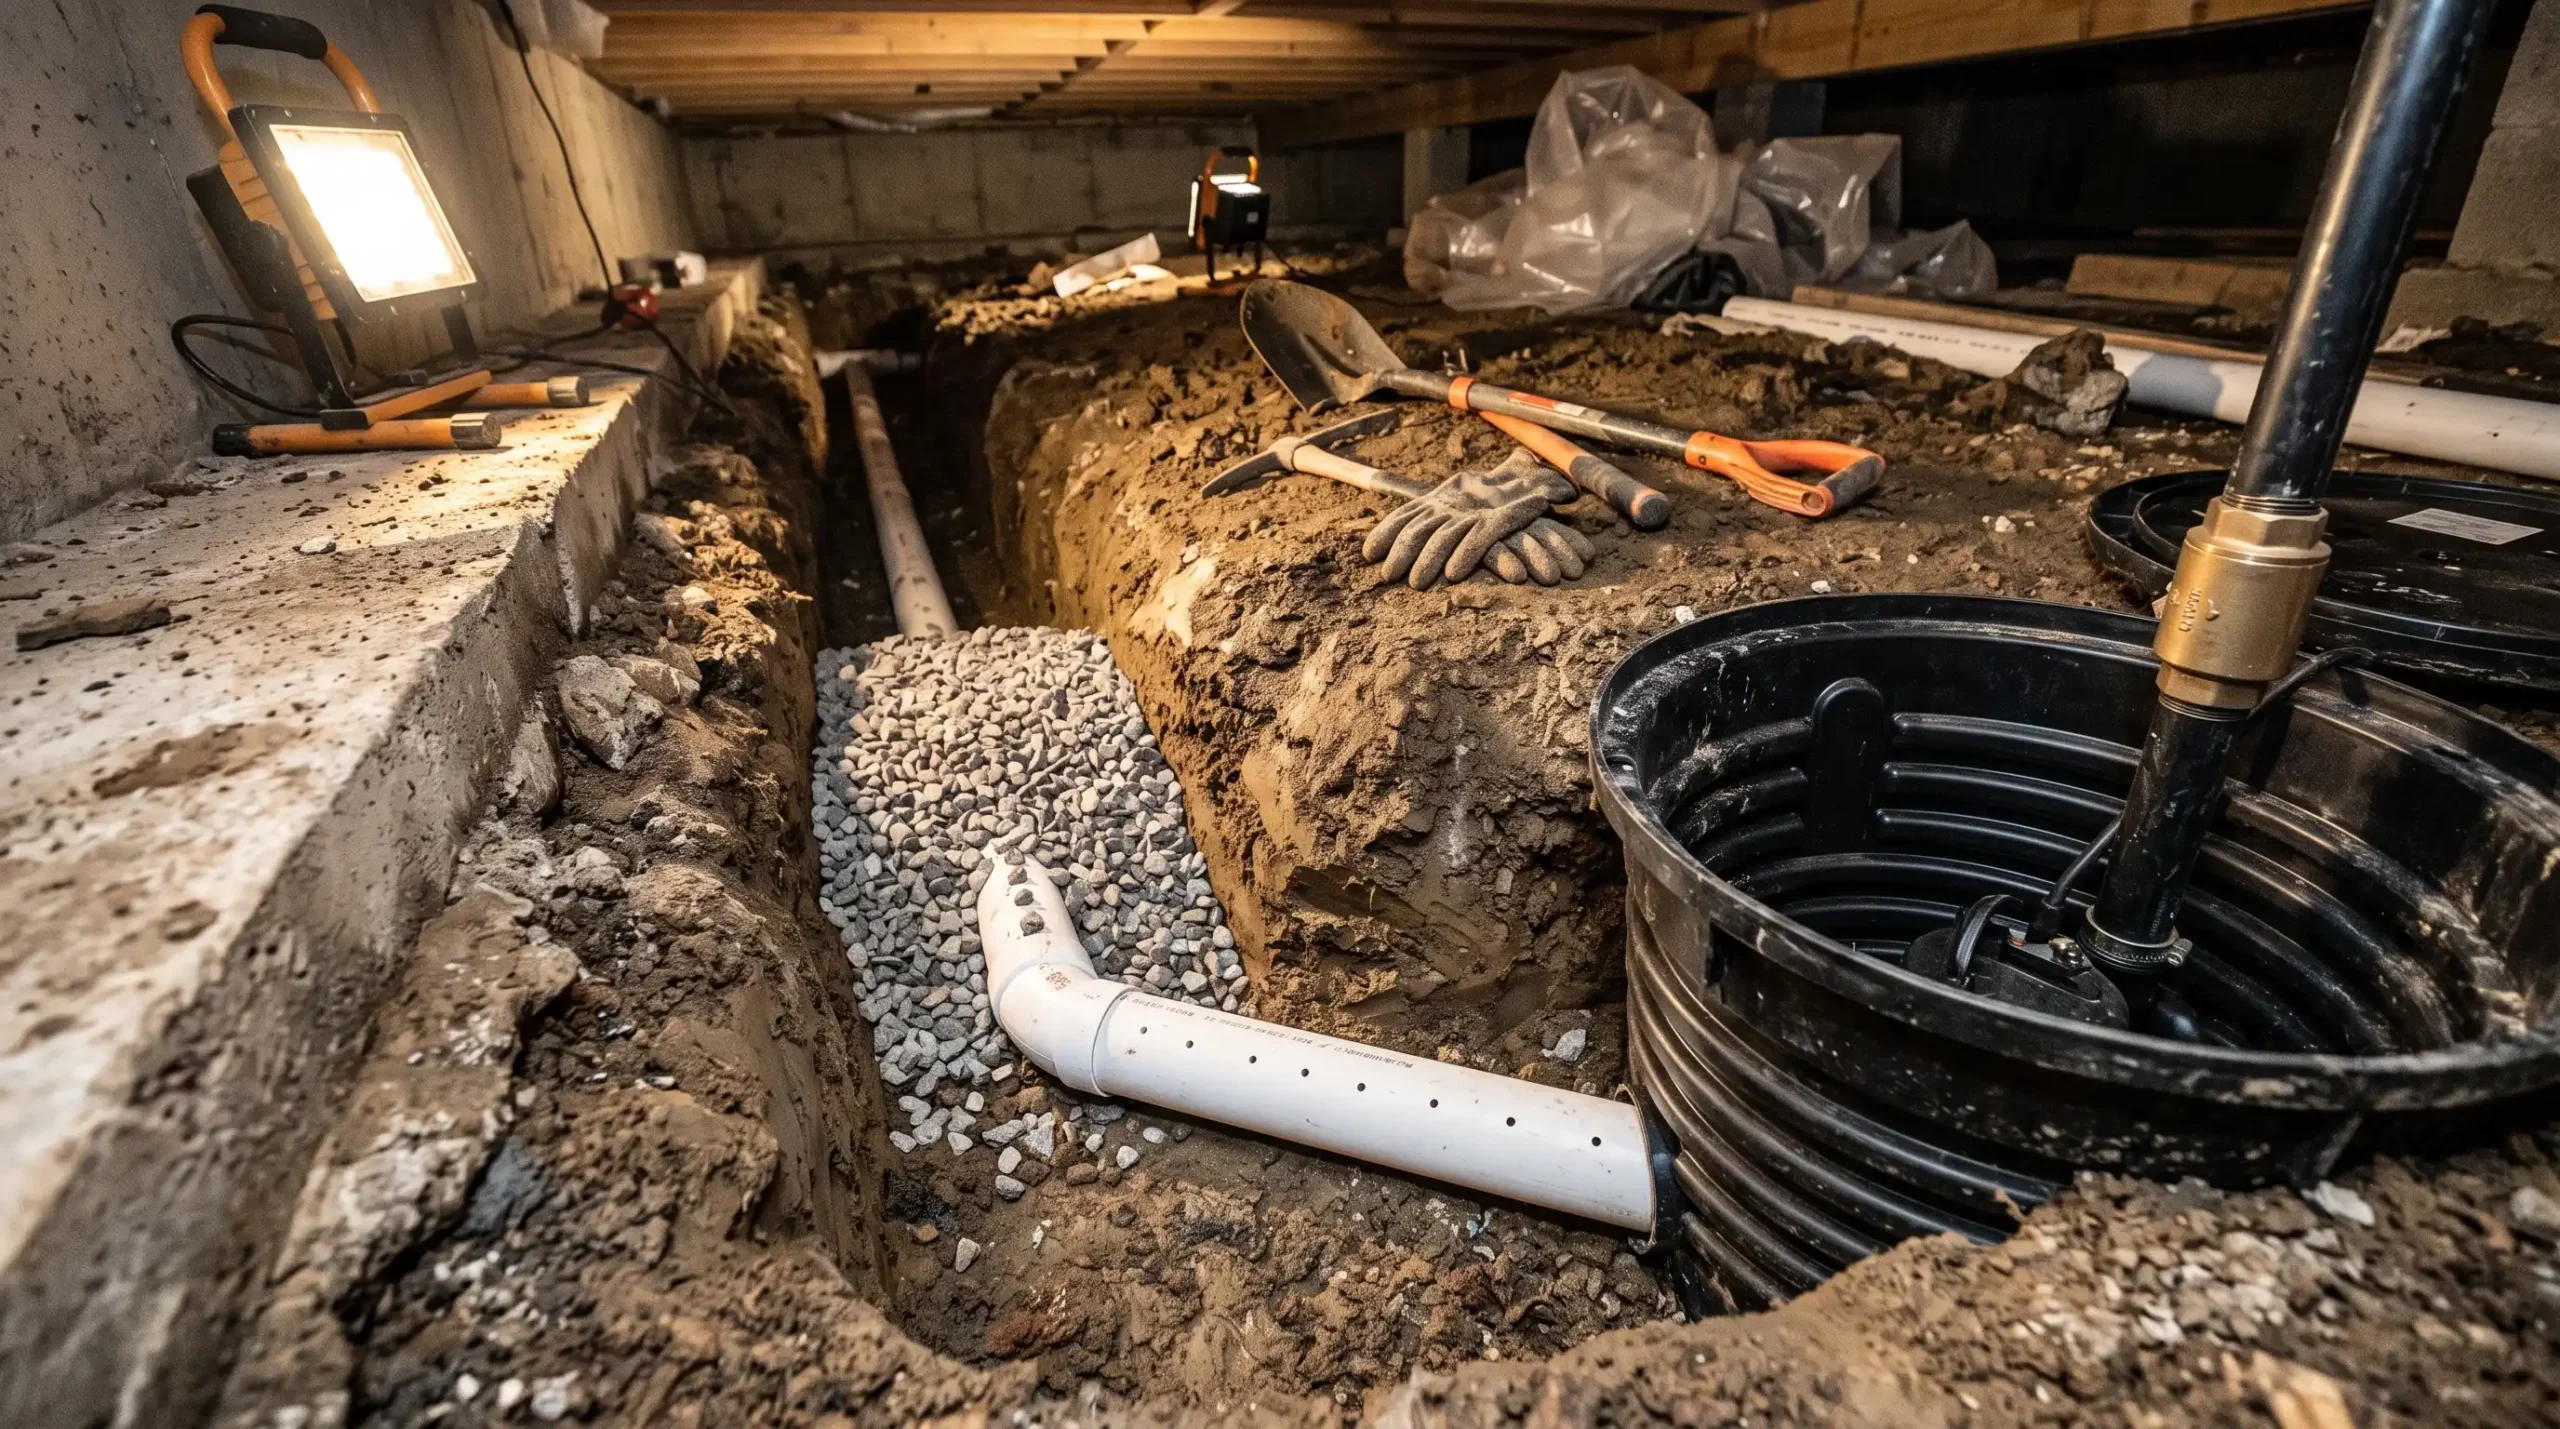
Install a perimeter interior French drain and an automatic sump pump basin if water seeps through walls or pools on the dirt floor during storms.
Phase 4: Structural Support and Pier Stabilization
Repair rotted joists, install auxiliary floor supports, and stabilize settling masonry piers before applying liners.
Phase 5: Subfloor Sanitation and Site Preparation
Remove fallen insulation, haul away construction debris, treat active fungal growth with antimicrobial solutions, and smooth out the soil.
Phase 6: Barrier Installation and Mechanical Conditioning
Install a reinforced vapor barrier across floors and piers, insulate rim joists, seal vents permanently, and set up a dedicated commercial dehumidifier.
Why Sealing Over Standing Water or High Hydrostatic Pressure Fails
If rainwater pools beneath your crawl space during storms, sealing plastic directly over the mud creates severe hidden problems. Water collects under the membrane, turning the ground beneath the liner into a stagnant pool.
Trapped water creates hydro-pressure that pushes the plastic upward, causing bubbling, foul sewer-like odors from anaerobic bacteria, and eventual seam failure. Any standing water issues must be permanently resolved through gravity drains or sump systems before plastic goes down.
Interior French Drains, Sump Basins, and Gravity Discharge Lines
Managing bulk water intrusion requires an internal perimeter drainage system. Technicians excavate a shallow trench along the interior base of foundation walls, install perforated corrugated or PVC drain pipe surrounded by washed gravel, and direct incoming water toward a heavy-duty sump pump basin.
The sump pump automatically lifts the collected water and expels it through a solid PVC discharge pipe safely away from the home. Once this drainage system is operational, the dirt floor stays dry, providing a stable foundation for the encapsulation membrane.
Inspecting Masonry Piers and Foundation Walls for Settlement
Excess moisture often weakens the soil bearing capacity beneath masonry support piers, causing floors above to sag and interior drywall to crack. If foundation walls bow inward from exterior soil pressure, installing encapsulation alone leaves those structural hazards unaddressed.
Properties suffering from shifting piers or cracked footings require targeted foundation stabilization to restore solid footing support. In cases involving bowed or displaced basement and crawl space walls, installing heavy-duty earth anchor systems stabilizes masonry against exterior pressure, securing the structural envelope before sealing proceeds.
Identifying the Warning Signs That Demand Immediate Action
Because homeowners rarely enter their crawl spaces, moisture issues often progress undetected for seasons. Learning to spot subtle clues inside your living space allows you to catch moisture problems early.
Routine visual checks inside your home help identify developing foundation moisture issues.
Indoor Symptoms and Their Probable Crawl Space Causes
| Observable Indoor Symptom | Probable Crawl Space Cause |
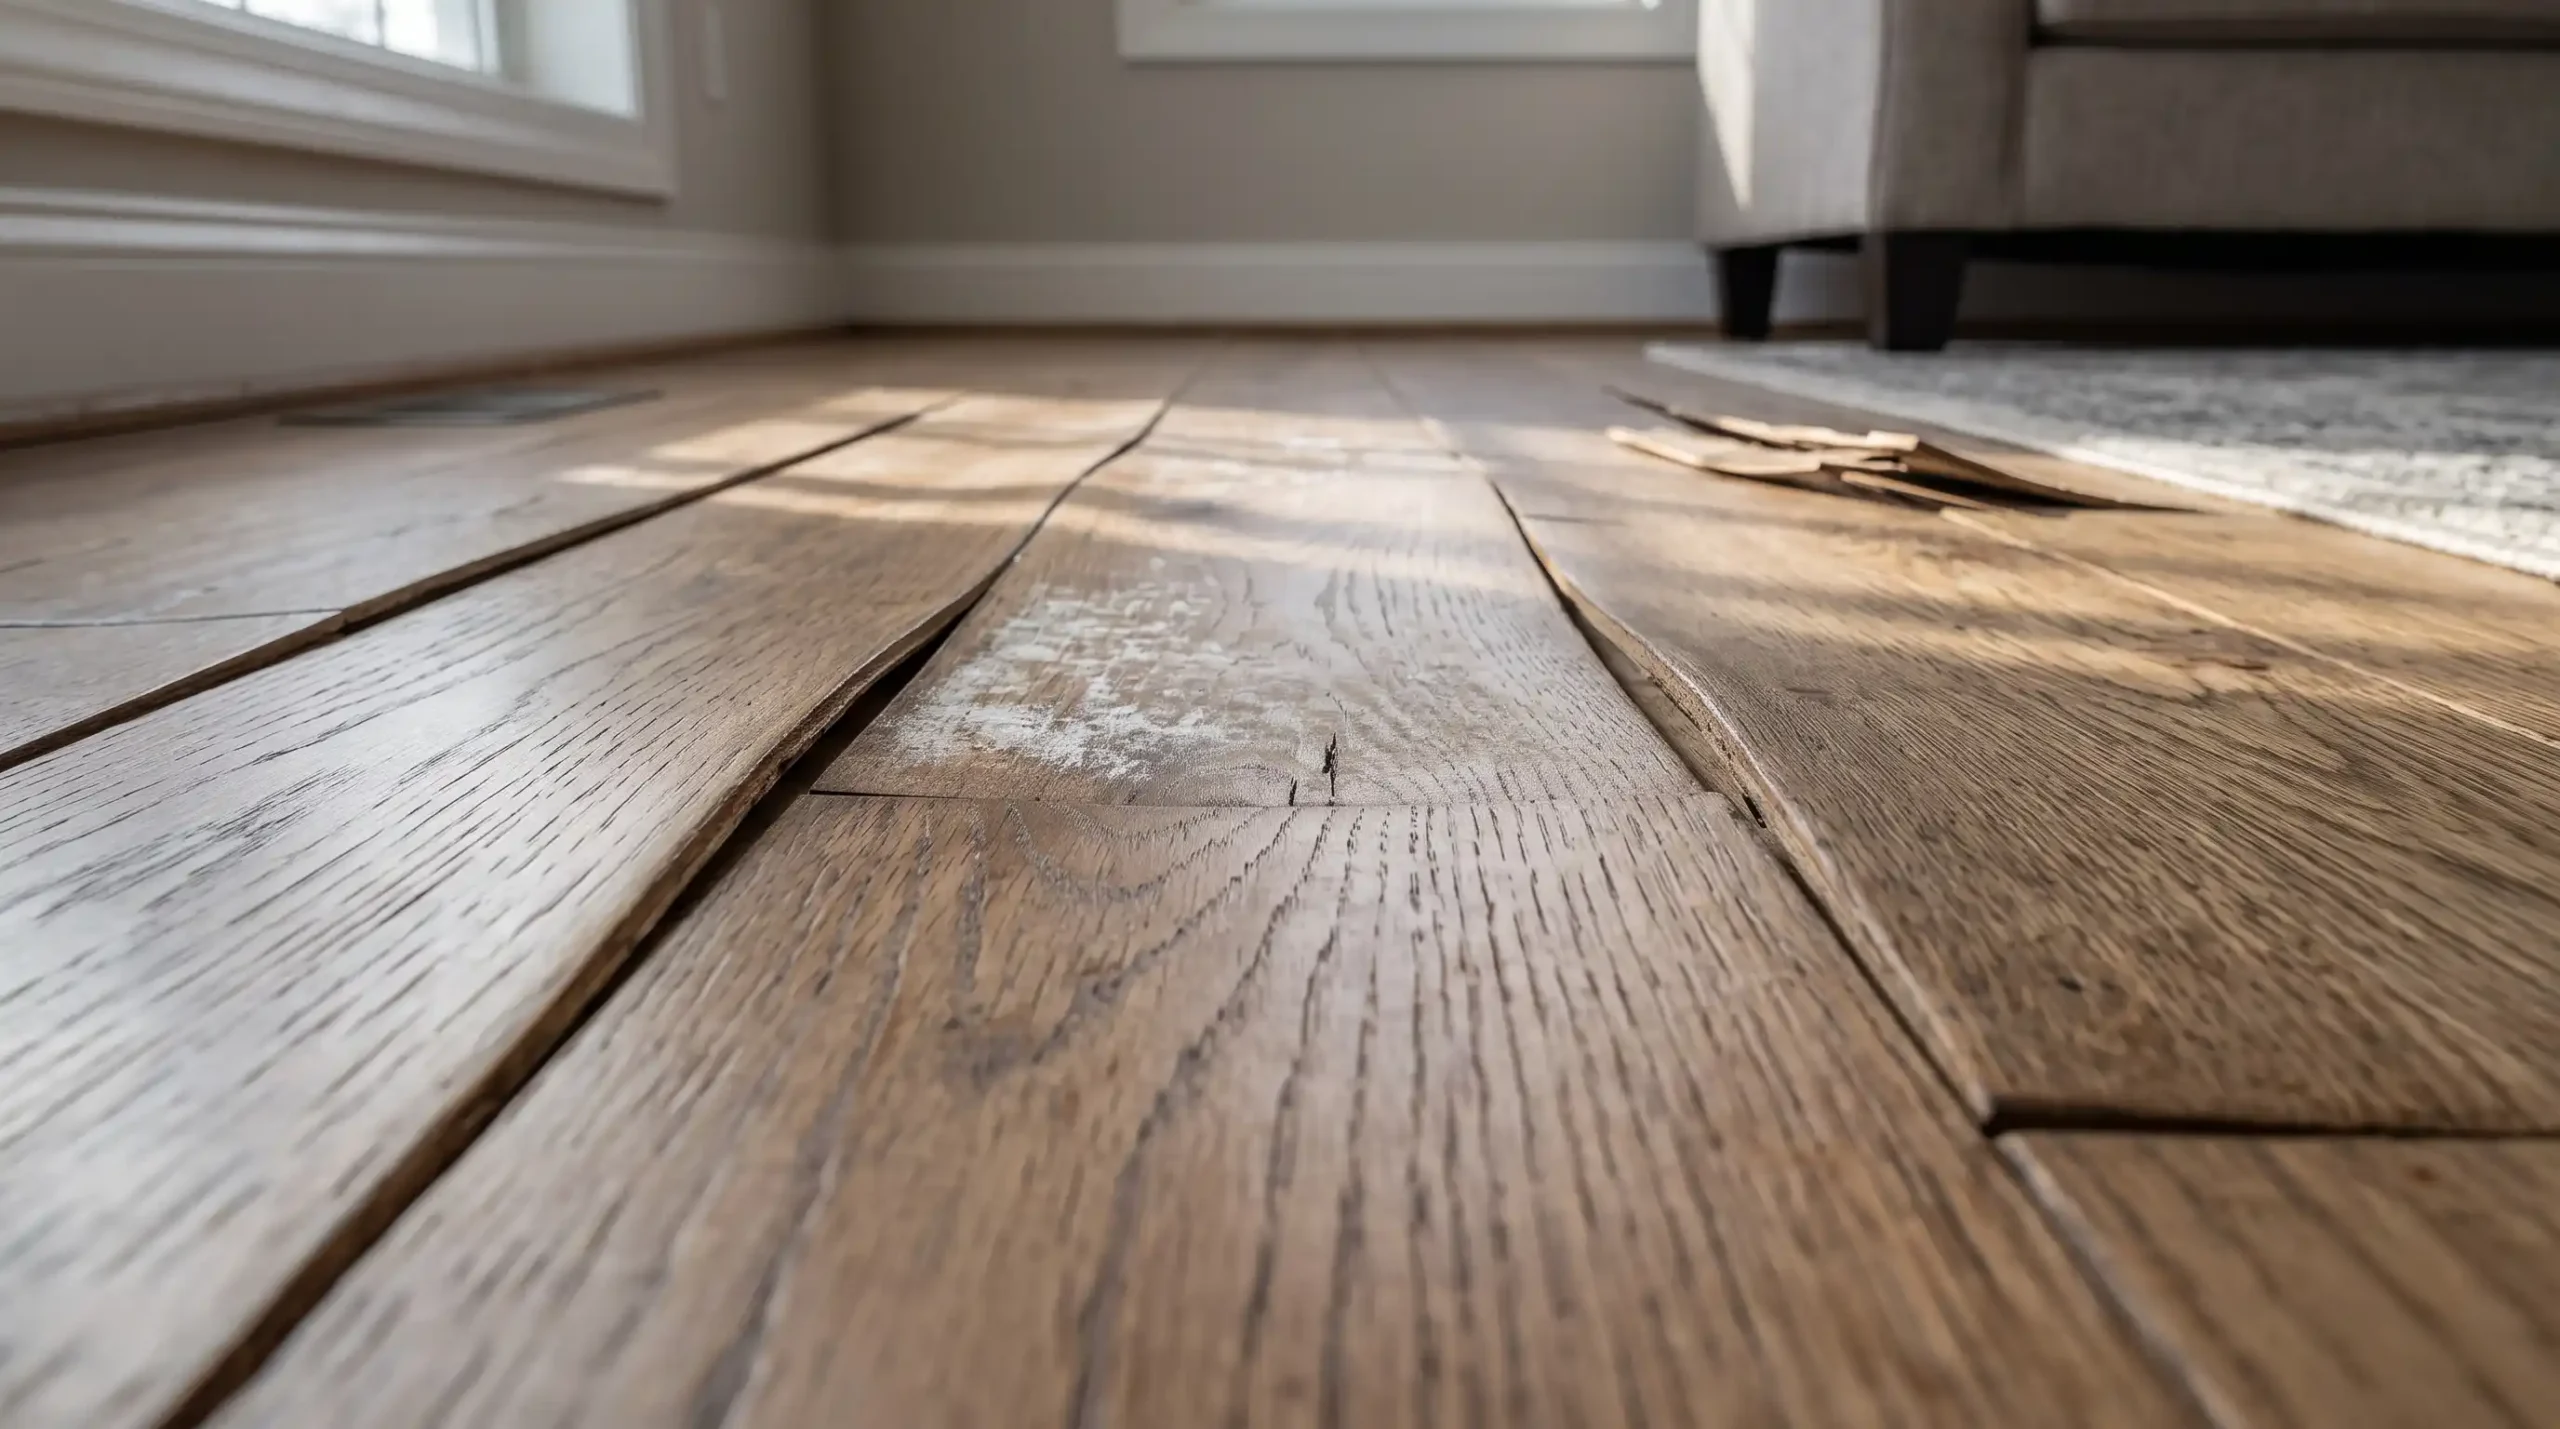
| Cupping or Crowning Hardwood Floors | Moisture vapor rising through subflooring, expanding the underside of floorboards. |
| Musty Odors Near Supply Registers | The stack effect pulling damp crawl space air and fungal spores into ductwork seams. |
| Interior Doors Sticking in Frames | Excessive framing moisture causing structural floor joists to deflect and shift door frames. |
| Cold Floors Throughout Winter Months | Open foundation vents allowing freezing outdoor air to circulate directly under subflooring. |
| Spongy or Bouncing Spots in Hallways | Ongoing wood rot weakening structural joists beneath high-traffic paths. |
Visual Clues in Your Living Areas and Along Floorboards
Your main level floorboards act as an early indicator of crawl space conditions. Wood absorbs moisture from the air, expanding across its grain as relative humidity rises.
Watch for these interior indicators:
-
Cupping Hardwood: Individual floor planks curve upward along their edges, creating a washboard texture across the room.
-
Separating Seams: Hardwood planks buckle or pull apart seasonally as moisture levels fluctuate.
-
Sticking Doors: Interior doors that previously opened smoothly begin sticking against their jambs as subfloor framing shifts.
-
Baseboard Gaps: Baseboards separate from flooring or show dark discoloration near corner joints.
If you observe these symptoms alongside foundation cracks or wall movement, seeking an evaluation for broader foundation repair helps determine whether structural movement is occurring alongside moisture damage.
Indoor Humidity Spikes and Respiratory Irritation Upstairs
Air quality issues frequently point to crawl space dampness. If your indoor humidity consistently remains above 60 percent during summer months despite running the air conditioning, your home is likely drawing damp crawl space air upward through the stack effect.
Occupants may experience persistent congestion, sinus headaches, coughing, or itchy eyes that lessen when leaving the house. These symptoms often stem from mold spores and microscopic dust mites that thrive in damp subflooring.
Signs of Wood-Boring Beetles, Termites, and Rodent Intrusion
Pests require steady moisture to survive. Damp framing attracts subterranean termites, carpenter ants, and powderpost beetles that avoid dry wood.
During exterior yard work, look for mud tubes along foundation walls or piles of fine wood powder beneath joists. Check for rodent droppings near foundation vents, which indicate that pests are using your damp crawl space as an entry point into the home.
Maintaining an Encapsulated Crawl Space Year After Year
An encapsulated crawl space functions as a mechanical and physical barrier system. While the heavy-duty liner requires minimal maintenance once sealed, the mechanical components demand routine attention.
Establishing a straightforward annual maintenance routine preserves your investment and keeps your crawl space performing as designed.
Annual Crawl Space Maintenance Schedule
Spring Inspection: Preparing for Humid Months
-
Check the remote digital hygrometer upstairs to confirm relative humidity stays between 45% and 55%.
-
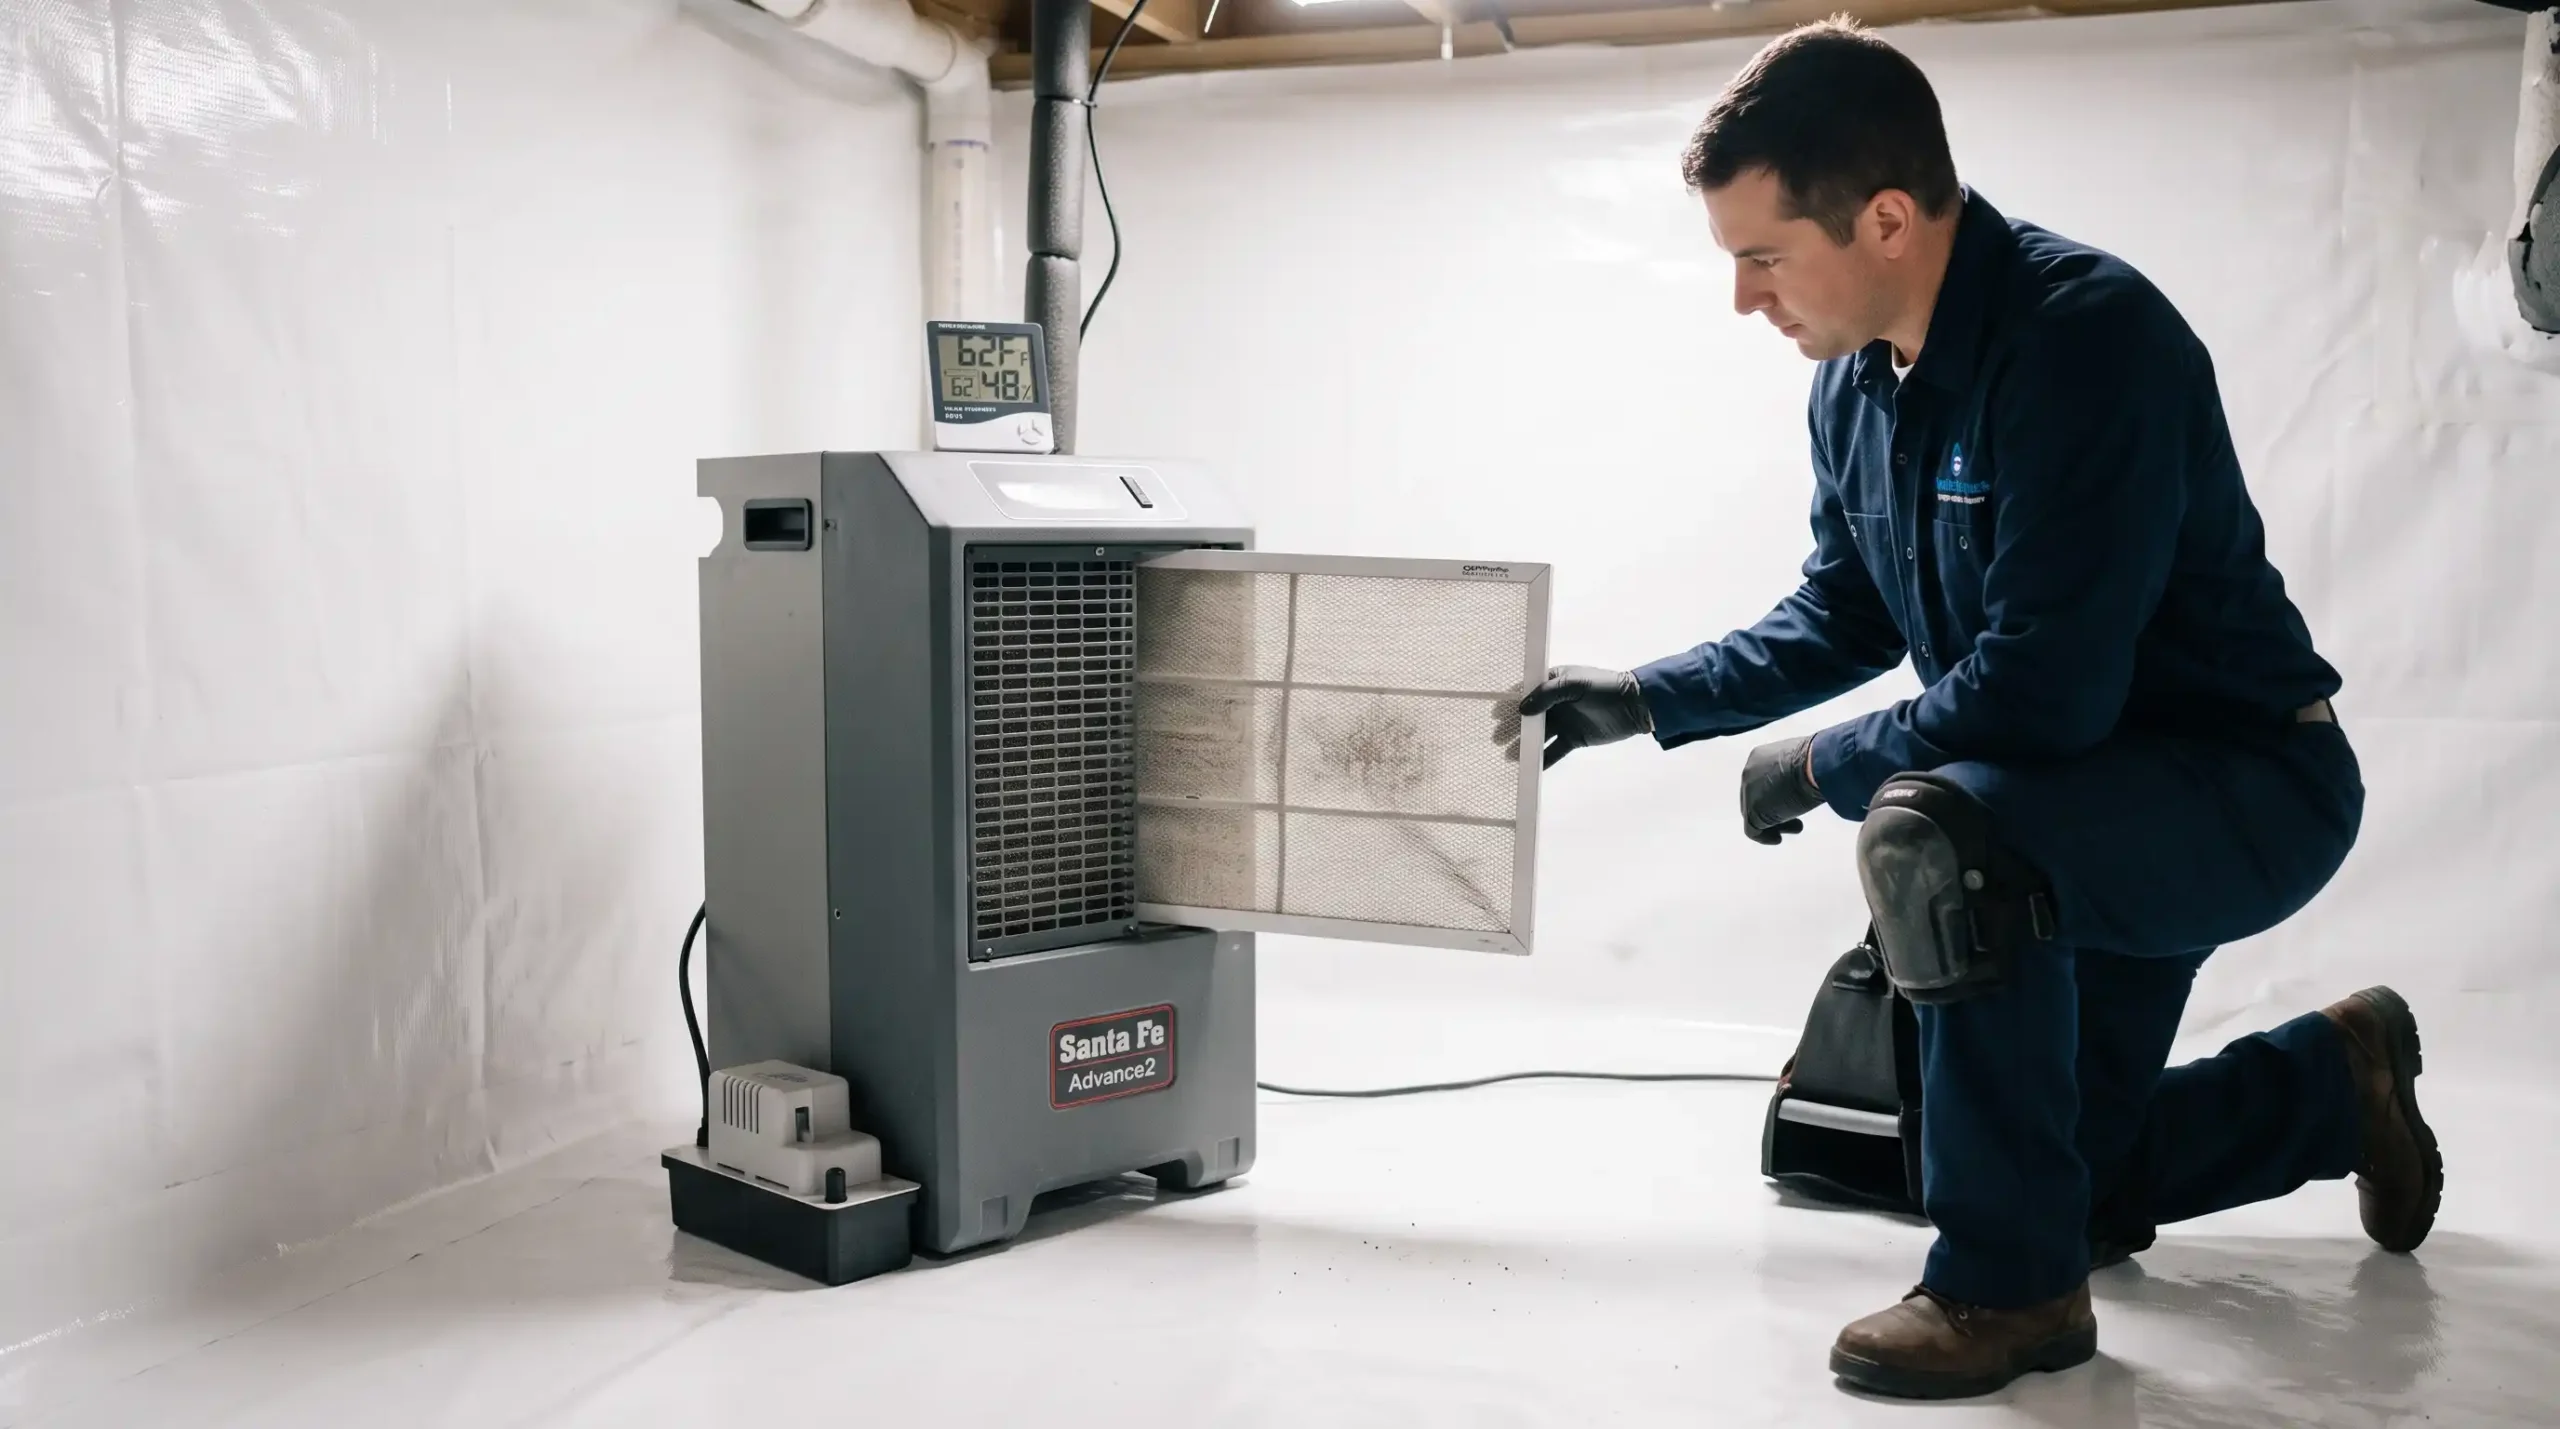
Wash or replace the air intake filter on the commercial dehumidifier.
-
Pour five gallons of water into the sump pump basin to confirm the float switch activates properly.
-
Inspect seam tape around foundation piers to ensure the adhesive remains tight.
Fall Inspection: Preparing for Cold Weather
-
Check the exterior dehumidifier discharge line to confirm it remains free of leaves and soil buildup.
-
Verify that the weatherstripping around the crawl space access hatch forms a tight seal against cold drafts.
-
Look along the three-inch termite inspection gap on foundation walls to confirm no mud shelter tubes have appeared.
-
Inspect overhead plumbing lines to ensure no slow leaks or condensation drips are pooling on the liner.
Monitoring Relative Humidity with Remote Digital Sensors
You should never have to crawl underneath your house just to confirm the system is working properly. Installing a wireless digital hygrometer sensor inside the crawl space with a remote display in your living area lets you check conditions in seconds.
Check that the monitor consistently registers relative humidity between 45 and 55 percent. If the reading rises above 60 percent for more than three consecutive days, inspect the dehumidifier for power interruptions or a clogged drain line.
Dehumidifier Filter Replacement and Mechanical Maintenance Schedules
Commercial crawl space dehumidifiers feature washable or replaceable air filters that capture airborne dust and spores before air crosses the cooling coils. A clogged filter restricts airflow, reduces moisture removal efficiency, and can cause the compressor to overheat.
Plan to clean or replace the filter every six to twelve months depending on local dust conditions. Inspect the flexible drain hose to ensure it remains clear of algae buildup, which can block gravity drainage and cause the dehumidifier to shut off automatically.
Sump Pump Float Testing and Annual Visual Inspections
If your encapsulation includes an internal sump pump, test the mechanical float switch twice a year. Pour five gallons of water into the crock to confirm that the pump turns on smoothly, discharges water outside, and shuts off cleanly without sticking.
Perform a quick visual check across the crawl space once or twice each year. Make sure the liner remains taped securely to piers, check that no overhead plumbing pipes are dripping, and confirm that the access door weatherstripping seals tightly against outdoor air. Technicians serving various service areas can perform these checks during annual maintenance visits.
Step-by-Step Decision Checklist for Homeowners
Deciding whether to encapsulate involves weighing your home’s unique physical layout, regional soil conditions, and your household budget. Use this structured decision checklist to determine the right course of action for your property.
| Diagnostic Question | If Your Answer Is “Yes” | If Your Answer Is “No” |
| 1. Does water pool on the dirt floor during heavy rainfall? | Stop and resolve bulk drainage first. Install interior French drains and a sump pump before laying plastic. | Move to Question 2. |
| 2. Does wood moisture exceed 16%, or do musty odors enter living areas? | Full encapsulation with a commercial dehumidifier is justified to protect indoor air and framing. | Move to Question 3. |
| 3. Are atmospheric gas appliances installed in the crawl space? | Consult an HVAC professional to install dedicated outside combustion air lines before sealing vents. | Move to Question 4. |
| 4. Do family members experience unexplained allergy symptoms indoors? | Encapsulation will substantially improve indoor air quality by stopping the stack effect. | Move to Question 5. |
| 5. Is the crawl space completely dry, with no wood rot, mold, or odors? | Maintain outdoor downspouts and clean vapor barriers. Full encapsulation can be postponed. | Schedule a professional on-site evaluation to check hidden framing conditions. |
The Ten-Minute Crawl Space Assessment
Before calling contractors for estimates, take ten minutes to gather basic diagnostic information about your foundation:
-
Check the Access Door: Is the door tight and weather-stripped, or loose and decaying?
-
Smell the First Floor Air: Do you notice musty, earthy odors near baseboards or HVAC registers?
-
Inspect the Exterior Grade: Does soil slope downward away from your foundation, or does water pool against brick walls?
-
Examine Gutter Downspouts: Do downspouts empty right next to foundation walls, or do they discharge at least six to ten feet away?
-
Look at the Wood Framing: Are joists clean and light-colored, or dark, stained, and covered in powdery growth?
Questions to Ask Foundation Contractors Before Approving an Estimate
Not all encapsulation contractors adhere to the same quality standards. Ask these specific questions before signing an agreement:
-
What liner thickness will you use on the ground and walls? Look for at least 12-mil to 20-mil reinforced materials. Avoid contractors using thin six-mil poly.
-
How will you maintain the code-required termite inspection gap? Ensure they plan to leave three inches of exposed masonry below the sill plate.
-
What capacity dehumidifier is included? Verify the brand, pint capacity per day, and warranty coverage.
-
How will you handle bulk water if it enters? Make sure they distinguish between water vapor control and standing water drainage.
-
Do you test for radon or evaluate combustion appliances? A safety-conscious contractor will address both factors openly.
Planning Exterior Grading and Gutters Before Interior Sealing
Interior encapsulation works best when paired with proper exterior water management. If roof runoff saturates the soil against foundation walls, hydrostatic pressure will constantly test your interior barriers.
Ensure your gutters are clean and fitted with extensions that deposit water well away from the foundation perimeter. Correct negative soil grading around flower beds so surface water flows away from the house. Managing water on the outside reduces the workload on your interior crawl space systems.
Protecting Your Home Foundation with Proven Professional Solutions
Deciding whether crawl space encapsulation is worth the cost comes down to protecting your home’s framing and improving your living environment. While the upfront investment is significant, leaving a damp crawl space open to humid air often leads to expensive structural damage, rotted subfloors, ruined hardwood flooring, and mold remediation down the road.
Because every foundation rests on unique soil, drainage, and framing conditions, an on-site evaluation by experienced foundation professionals is the best starting point. Homeowners in the greater Charlotte metropolitan area can schedule a site assessment through our Charlotte residential foundation services team, while property owners in South Carolina can connect directly with our Rock Hill residential foundation services specialists for localized soil and moisture advice.
When you are ready to eliminate musty odors, protect your wood framing, and stabilize your home’s indoor humidity, contact our team directly to schedule your on-site crawl space evaluation and receive an itemized project estimate.